


I'm Daniel Schifano, a multi-faceted designer and design team leader with 9+ years of experience. I'm also the Design Instructor for Zero To Mastery.
Today I'm here to tell you the 5 reasons why you should use Figma, as well as share how you can quickly start creating beautiful designs.
Before we dive in, I'll quickly recap what Figma is and why I think you should learn Figma. If you're already convinced, just scroll past the next section.
What is Figma?
Figma is a collaborative web-based user interface design tool that works right within your browser.
This means you aren’t tied to any operating system or need to download any software. But that doesn't mean you can't, as there is an app for Mac and Windows.
Figma makes it super easy to design, prototype and hand off work with others. Countless design teams are using Figma to collaborate across a single team or an entire business (including the team here at ZTM).
You can use Figma for a zillion (only a slight exaggeration) different design tasks and projects:
- Creating general graphic designs
- Designing user interfaces for websites and mobile
- Creating amazing prototypes
- So much more
It's become one of the most popular design tools used amongst design professionals today.
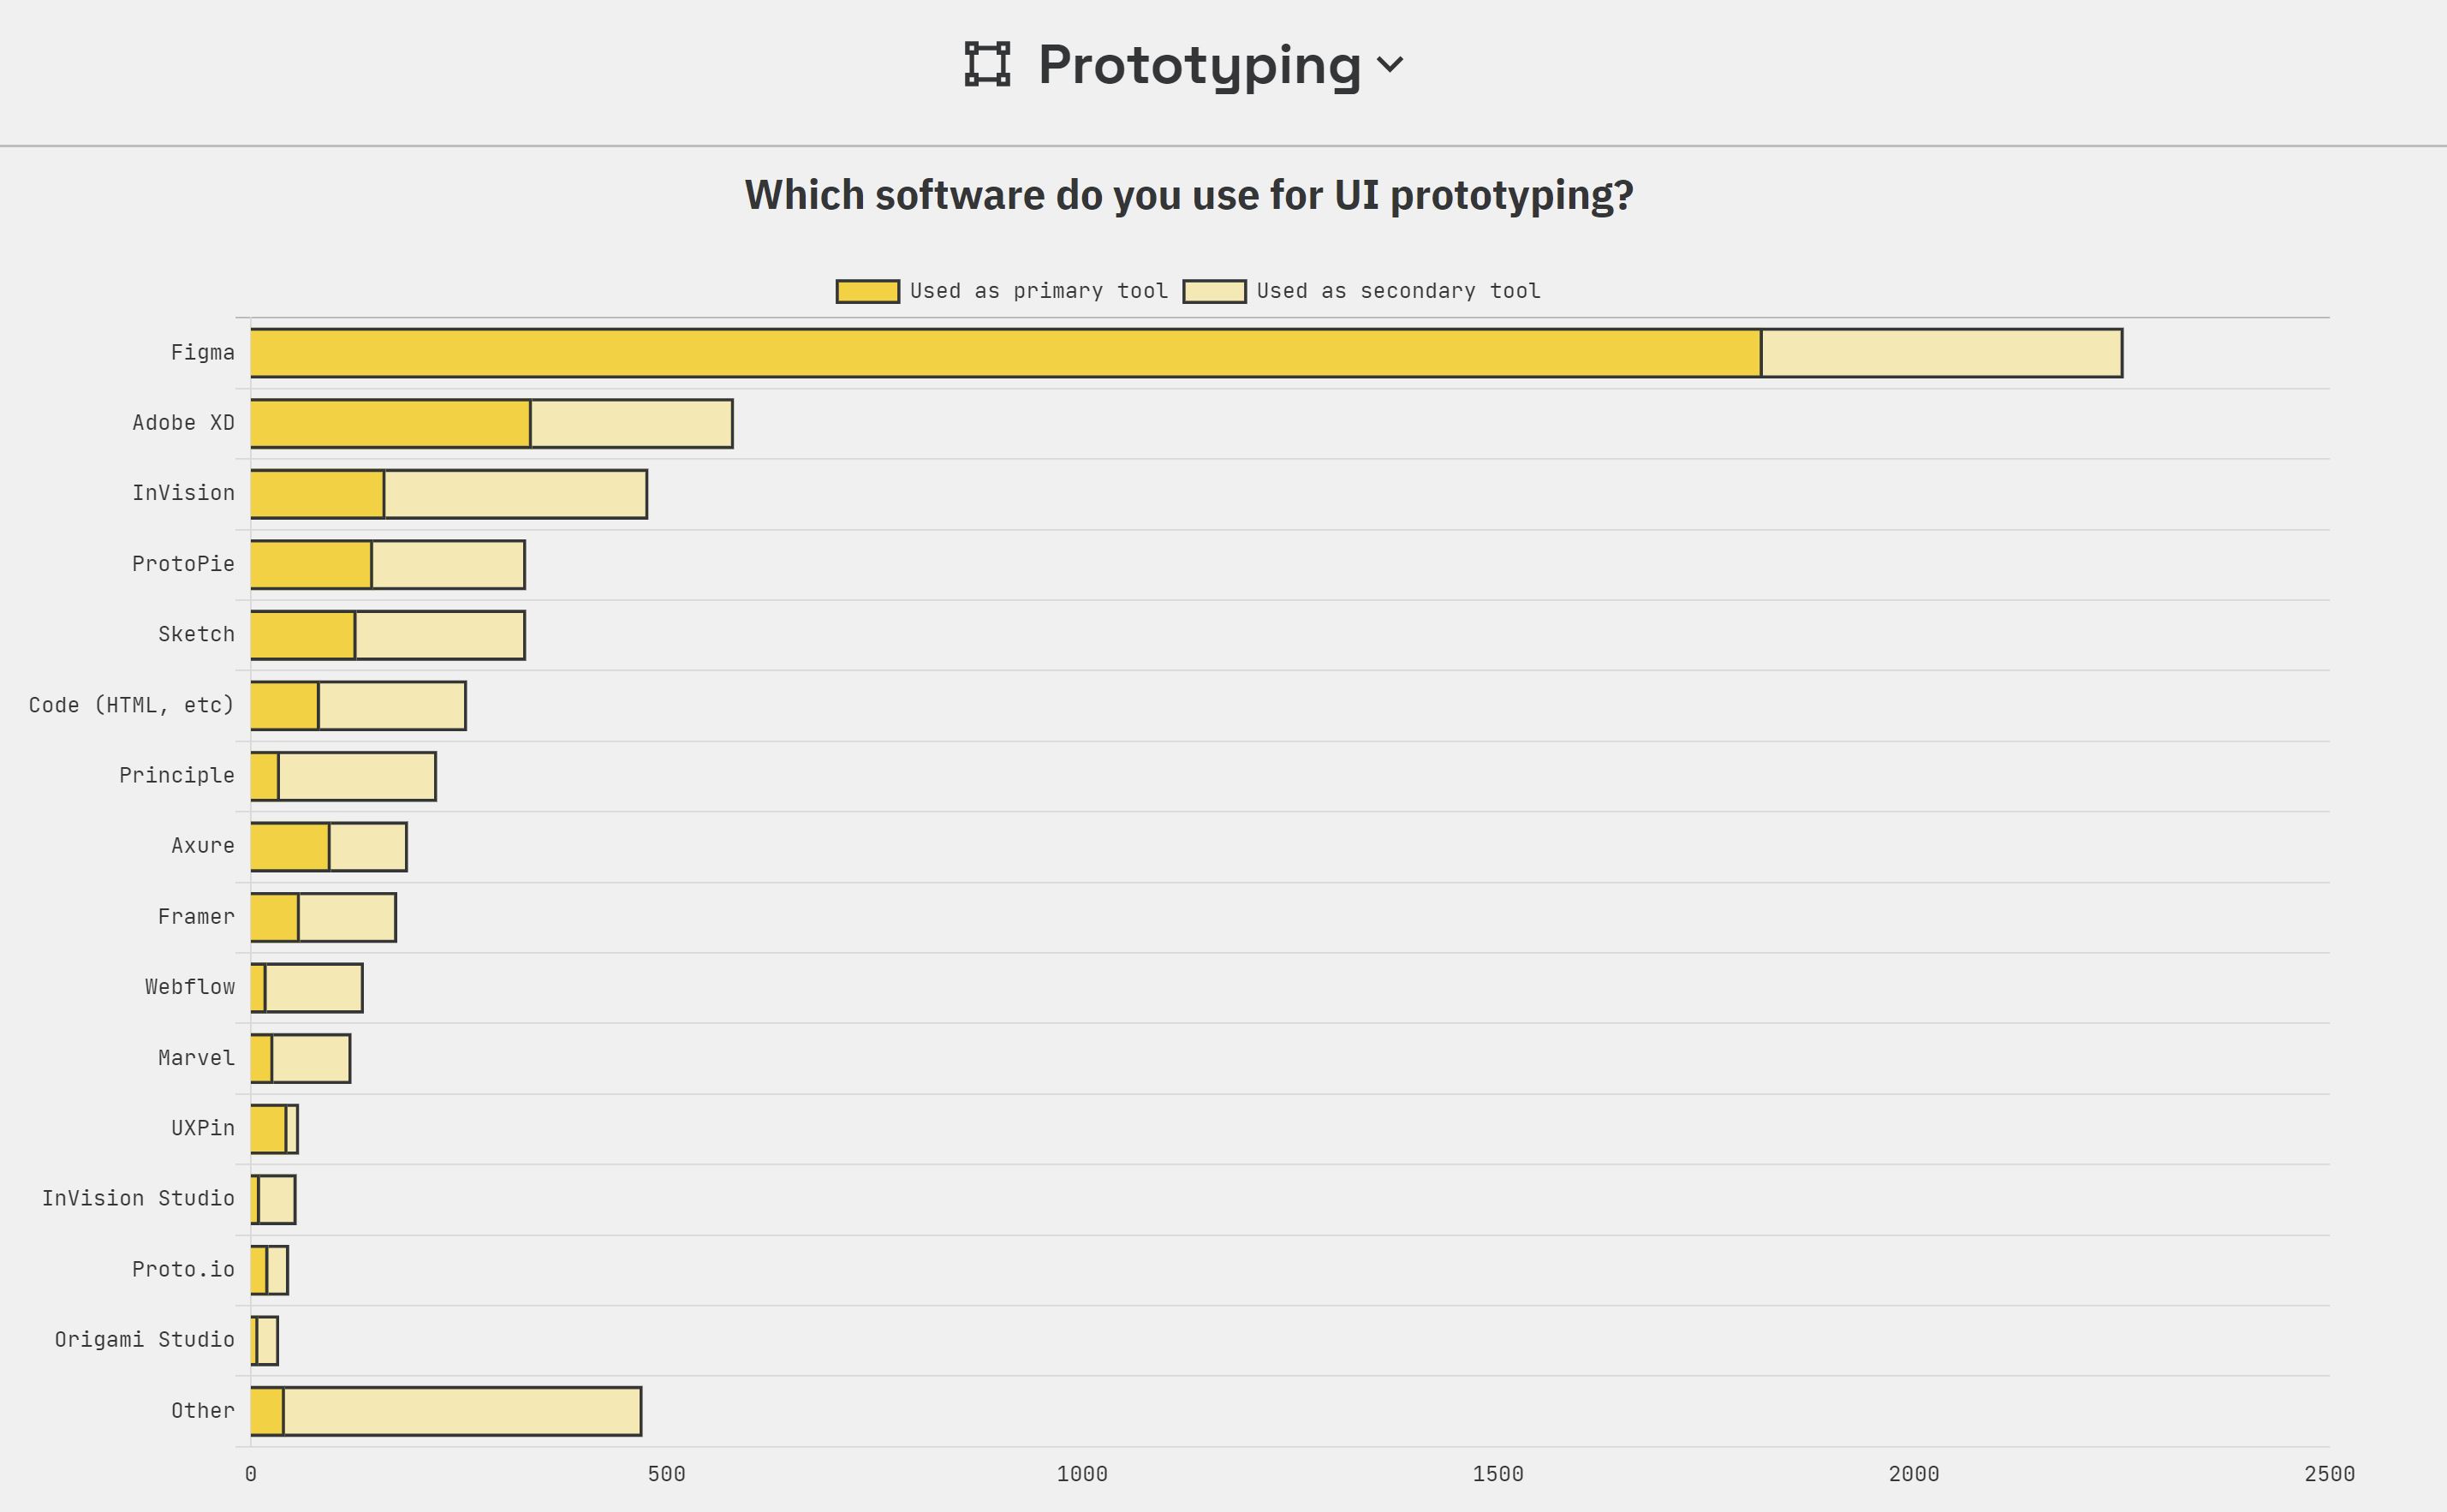
Here's just one example of how popular Figma has become. It's not just the top prototyping tool designers are using. But it's the top tool by a HUGE margin.
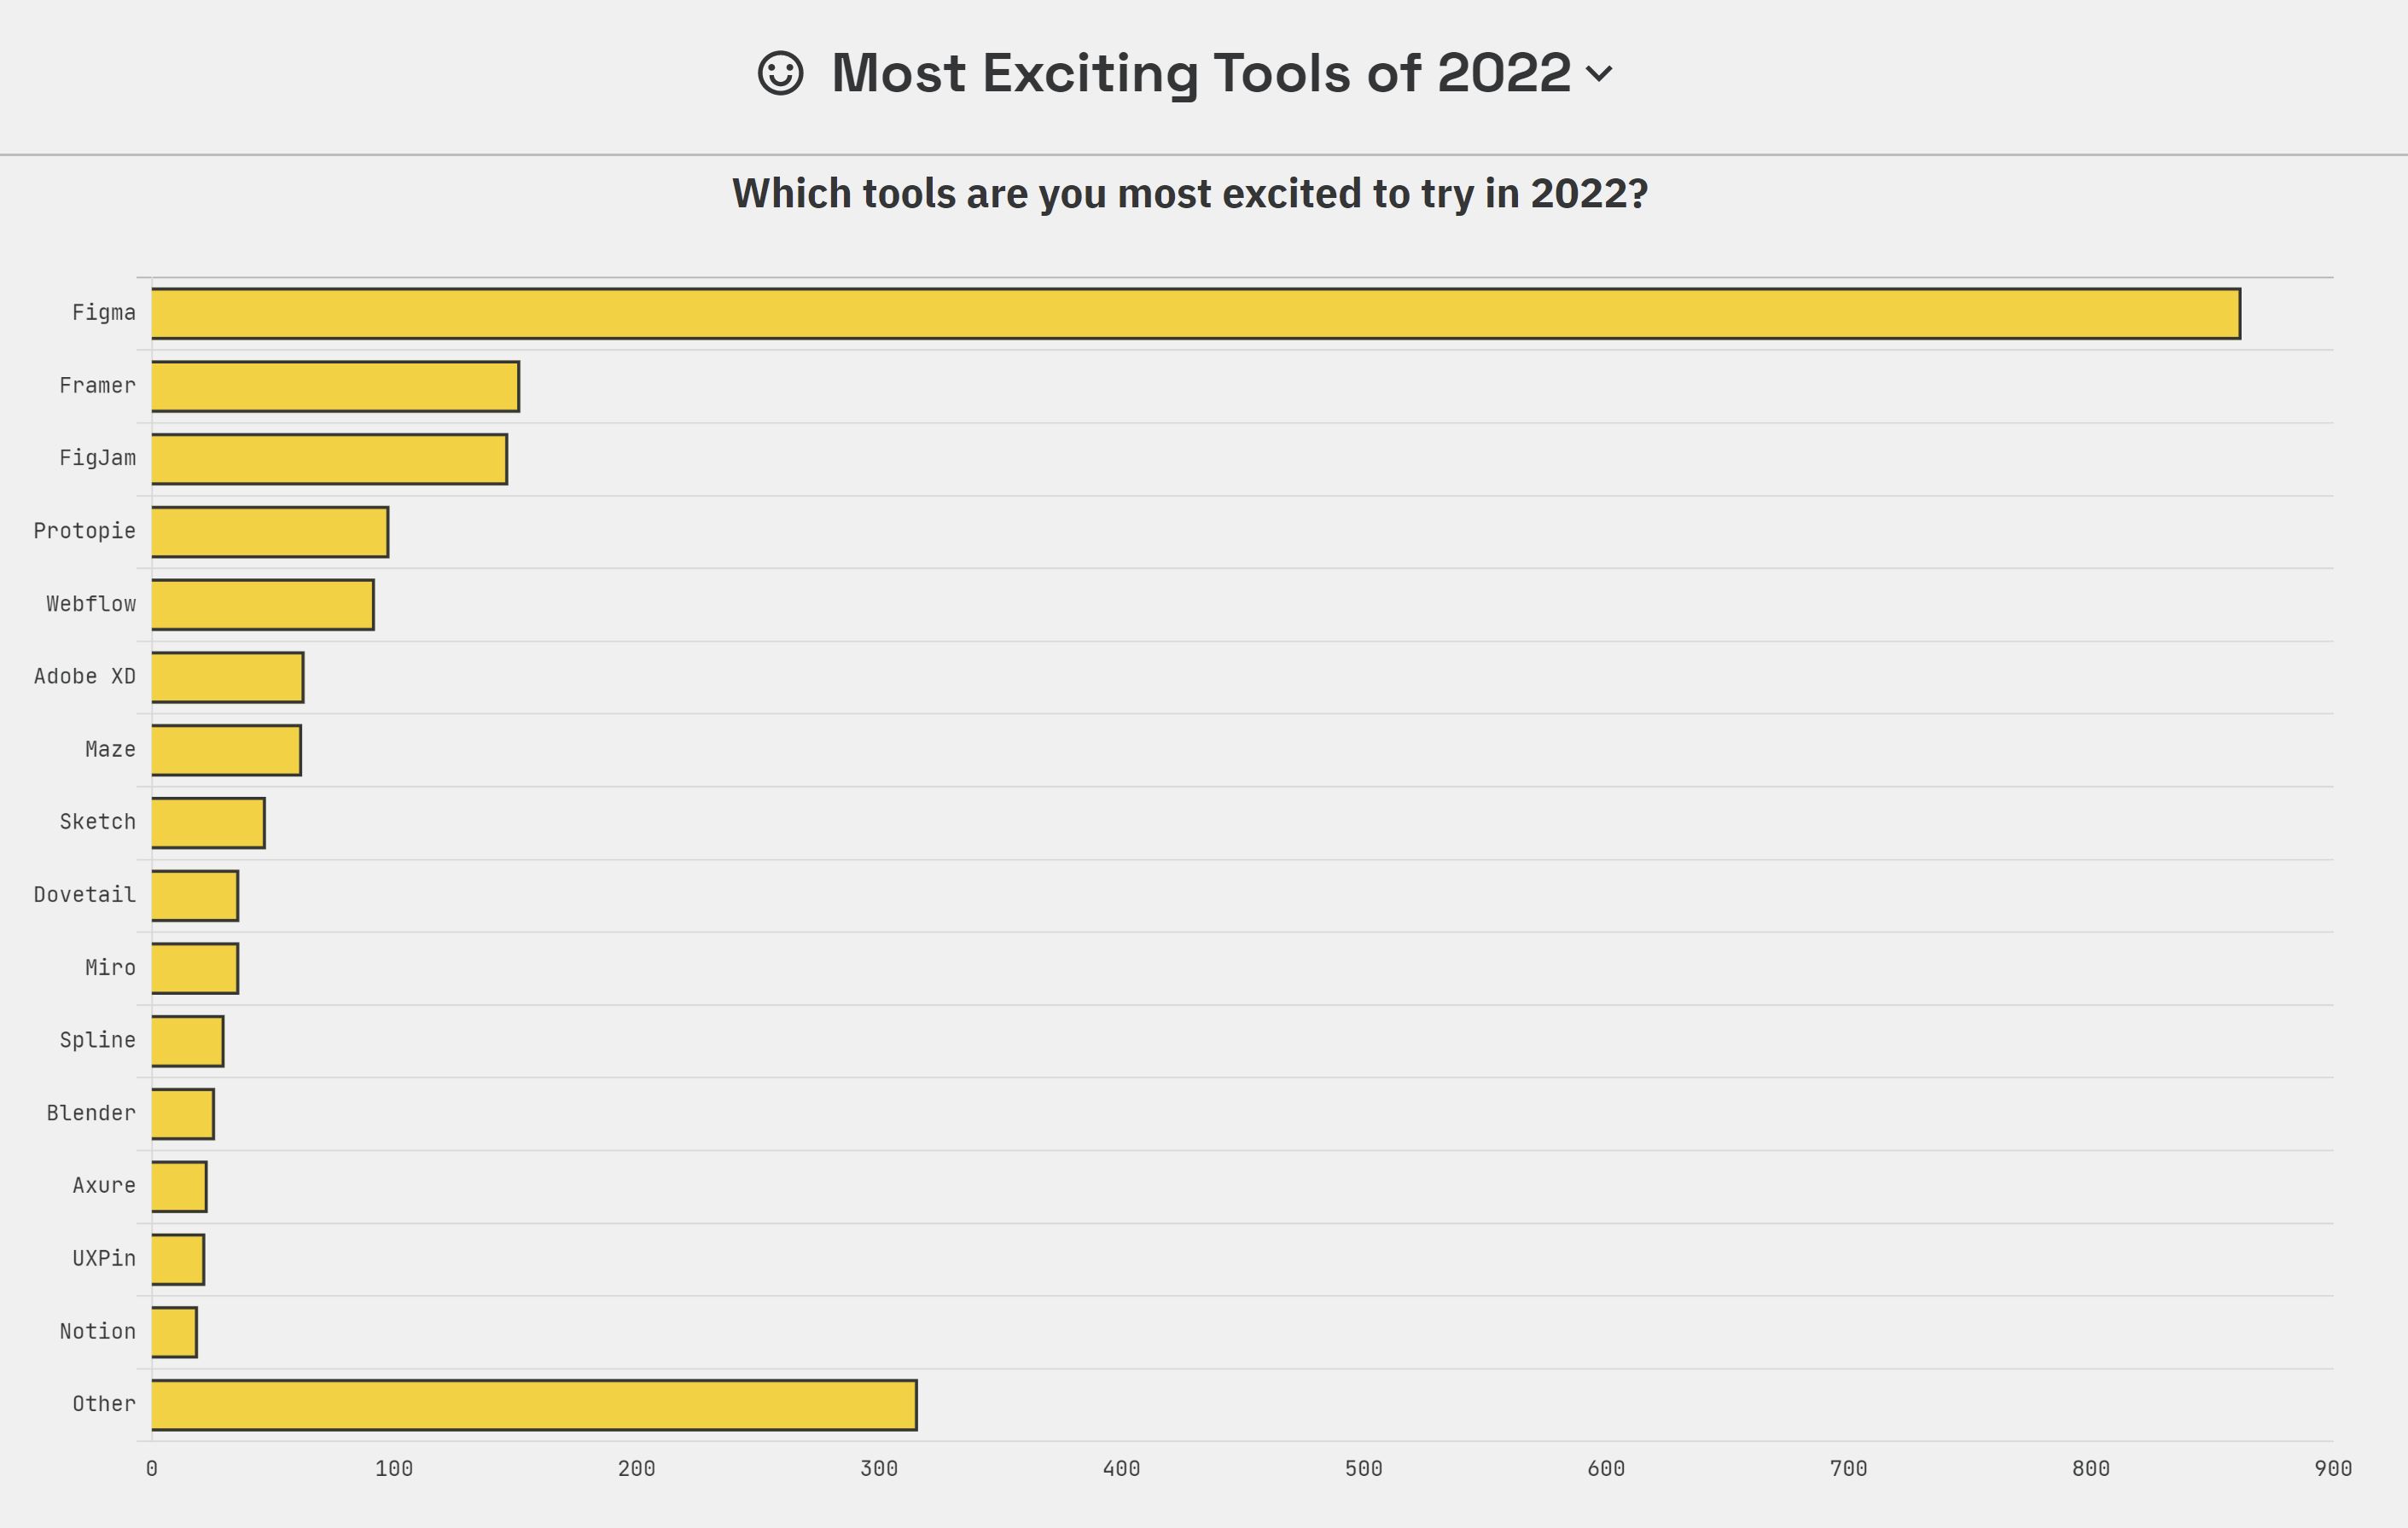
And even though it's already so popular, you still wouldn't be alone if you're excited to try it out for the first time.
The takeaway? Learning Figma can lead to some great full-time and freelance job opportunities and it can help take your design projects to the next level.
The best part? You can use Figma for free!
So there's nothing stopping you from trying it out. If you end up loving it or just need access to more projects, then the professional plan is also a great deal.
But learning a new tool can be scary at first. And it's even scarier thinking about how you'll get your designs and workflow up to par with what current professionals are doing 😱.
But fear not! You've come to the right place.
I’m here to help you understand how any Figma beginner can supercharge their designs and design process using Figma by using some of Figma's greatest features like:
- Auto Layout
- Design Systems
- Interactive Components
- Prototyping
- Plugins
I'm also going to show you using images and GIFs throughout so that you can actually see what I'm talking about. Let's go!
5 reasons why you should learn Figma for your designs
Now that we're all on the same page. Let's get into how you can use my 5 favourite Figma features to create your awesome designs and save you time.
Reason 1. Figma Auto Layout
One of the greatest Figma features is the ability to group content and make that content responsive.
Whether just typography or a combination of user interface elements, Figma Auto Layout allows you to group your elements within a frame which will grow to fill or shrink to fit as the content changes.
Regular Frames
You can use regular Figma frames to add layers directly to the canvas. Generally you will want to add a container or a certain screen size to contain those layers. This is usually what you should create your designs in.
If you're familiar with other UI design tools like Sketch, this is often called an artboard.
Figma changes the concept of artboards by allowing you to nest frames within frames. This allows you to create more complex designs with multiple containers. That isn’t possible in other design tools.
You can easily create a frame by using the keyboard shortcuts “F” or “A”. Alternatively, you can select the frame tool from the toolbar.
You can also set constraints for a frame. This defines how the layers within respond when you resize a frame. You can even set the constraints of the layers within to try and mimic responsiveness as well.
Auto Layout Frames
The problem with regular frames though is that they don’t create true responsiveness.
For true responsiveness, you can use auto layout frames.
When using auto layout, the frame expands and shrinks based off its constraints and the layers within. So that means that it will accommodate longer text strings or maintain alignments as your designs change.
You can use auto layout to create buttons that grow or shrink, to build lists that change based off of items that are removed or added, and you can combine them to build entire user interfaces.
With auto layout frames, you can create responsive layouts using the following properties:
Direction
Direction describes the way the auto layout frame will flow.
Spacing between items
You can control the spacing between items in an auto layout frame.
Padding
You use padding to control the white space between the child objects and the boundary of an auto layout frame. You can set the padding to be uniform all around the frame, or have different values for top, right, bottom, and left padding.
Distribution
Once you've set alignment rules for child objects in a frame, choose how those objects will be distributed within that frame.
Alignment
You use alignment to set how child objects are aligned within an auto layout frame. Both the direction and distribution (both of which I talk about above) of the auto layout frame will determine what alignment options are available to you.
Reason 2. Figma Design Systems
What is a design system?
Designs systems are so important when working on design teams or with large design projects.
Think of design systems as a living style guide. They're collaborative, but they're also intended for product teams to use as a guide for the product’s design language. It's je ne sais quoi.
Design systems should be consistent, dynamic and (most importantly) reusable.
In Figma you can use styles and components to create your design system and speed up your workflow by using your design system. It can contain pre-defined UI elements like buttons, forms, typography and color.
No need to recreate the wheel!
Styles
Figma gives you the power to set simple styles. This includes foundational elements like color (including gradients and images), typography, and effects (like drop shadows).
The great thing here is that whenever you make a change to a style’s properties, Figma will apply those changes to any objects using that style.

Components
Think of components as the building blocks of your design system in Figma.
They’re reusable elements like buttons, forms, navigations, and cards. Just like with styles, if you change the master component Figma will also change any instance of that component elsewhere.
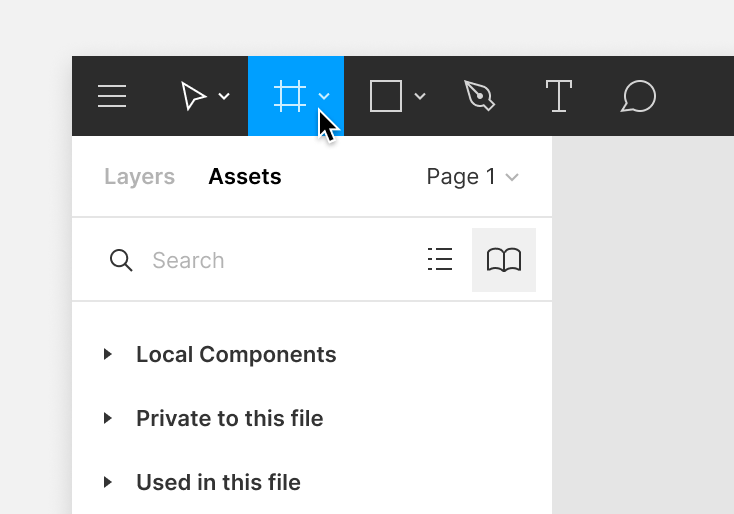
Figma also allows you to have components nested within other components. You can then access these components from your assets tab to easily populate your designs with your pre-defined elements.
I also cover creating components in Figma in my Design Bootcamp.
Reason 3. Figma Interactive Components
You've already learned about why components in Figma are so powerful, but let's take that a step further.
Before Figma’s release of interactive components we needed to link many frames together to get our desired effect, and it looked like a mess (example below).
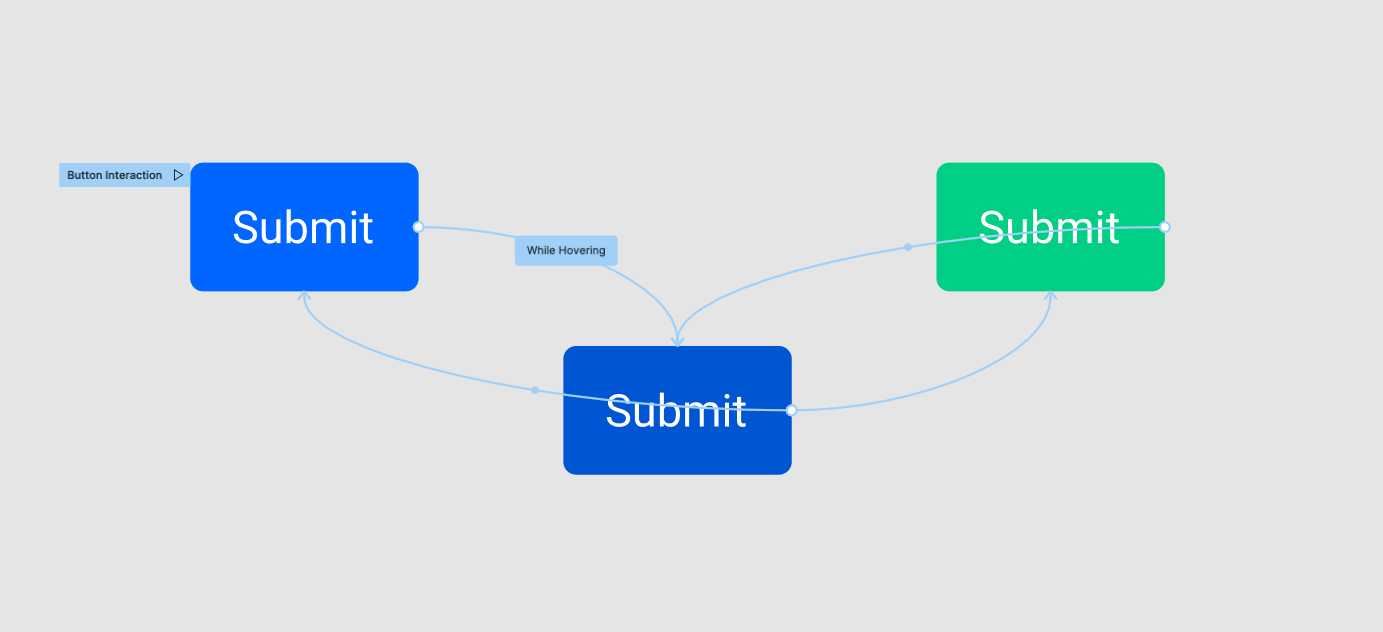
But now by using interactive components in Figma, you can show what each interaction looks like. For example: how a checkbox works or what happens when someone hovers over a button.
Variants
By using variants in Figma, you don't have to make the same connections over and over again whenever we want to show a component’s interactive states.
Instead, all you have to do is make sure that you set up several versions of the button as a variant, and then make the prototype connections within that variant set.
With only one frame we can insert the interactive component and not have to make duplicates of the modal. Instead that interactive component’s connections are persistent wherever we use it.
Reason 4. Figma Prototyping
Figma makes it super easy to prototype your wireframes and high fidelity designs.
💡 Pro Tip: I like to start the prototyping process very early in my design process so that I can share with others to get early feedback.
To create a prototype, just go the prototype tab on the right sidebar. From there you can easily start connecting your frames to create simple prototypes.
Watch this to see how to create a quick, simple prototype.
Smart Animate
Making quick prototypes is great and all, but what if you want to create prototypes that mimic the look and feel of a real product?
Don’t worry, this is where Figma smart animate comes into the picture.
With smart animate you can create advanced animations. Figma actually looks for matching layers, recognizes the differences from one frame to the next, and animates the layers within the prototype. Pretty nifty!
Figma’s smart animate also allows you to create advanced animations for loading sequences, parallax scrolling, touch gestures, sliders, toggles and switch, and much more. You can animate several properties of a layer like scale, position, opacity, rotation and fill.
GIFs
When prototyping with Figma you can even include gifs!
This is incredibly helpful for instances where you may need to showcase how a loading interaction works, or if you want to feature video content within your product.
All you have to do is place your gif directly within your file and run your prototype.
Reason 5. Figma Plugins
What are plugins?
Figma plugins are incredibly powerful tools that you can use to help reduce the pain of common tasks.
They can also help extend the functionality of Figma or can serve to improve your workflow a little bit at a time.
You can add a plugin by simply navigating to the the community page and installing a plugin.
To access your plugins just right click while you are in your file and select the plugins option.
Best Figma Plugins
Use Content Reel to design layouts more efficiently by pulling text strings, images, and icons from one palette. It lets you create custom content and share it with other Figma users. Collaboration has never been easier!
Use Material Design Icons to find and use icons. You can search icons by name to make things quick, and to narrow down your icon search you can filter by category, style, and size, and even choose between different styles such as filled, outlined, and rounded.
Use Better Font Picker to help you select fonts. Now you can skim through all those 1,000s of fonts installed seamlessly rather than using the default font picker in Figma!
Figmotion is an animation tool built right into Figma.
It makes animation easier and more convenient, as there is no need to switch to a completely separate motion tool such as Principle, Haiku or After Effects.
Use Mapsicle to quickly and seamlessly place maps in your mockups. An interactive map lets you pan to the perfect location, or you can search for a place anywhere in the world. Once you've placed a map in your designs, head back into Mapsicle to adjust the location, style, zoom level and more. You'll never have to take a screenshot of a map again!
Use Unsplash to quickly insert beautiful, high quality images straight into your designs. The key is that the Unsplash License allows images to be used freely for both commercial and personal projects, so no need to bring in the lawyers!
Use the Remove.BG API to remove the background of images with just a single click.
Use this Figma plugin to generate ‘lorem ipsum’ text. That's the text you think is always English at first, and then you quickly realize you can't read it.... The text is useful to fill your text layers with dummy text.
Select all the text layers you want to generate ‘lorem ipsum’ text for and then click ‘Generate’. This will generate the dummy text for each layer uniquely.
Clicking ‘Auto-generate’ will automatically fill the selected layers with the perfect amount of ‘Lorem ipsum’ to fit the existing frame.
How to learn Figma?
So there you have it - 5 reasons why you should learn Figma for your designs. It really is one of the absolute best design tools out there, both for personal and collaborative uses. There's a reason it's so widely used by professional designers!
I just released a the latest updates to my Figma course that will teach you to go from an absolute beginner to a master of creating beautiful motion designs with Figma: Motion Design with Figma: Animations, Motion Graphics, UX/UI.
In this course you'll actually get to build real-world projects alongside an industry pro (me!), and by the end, you'll have created your own professional design portfolio so you can start working in the amazing field of design.
You can even try some of the lessons for free! Just click any lessons with a preview button.
Sidenote: I also teach Complete UI/UX Product Design Bootcamp: Zero to Mastery. This is a great option if you really want to dive into the wonderful world of design using Figma and much more!
Want me to write more posts like this one? Send me a message on Twitter and tell me what you want me to write about next!


