


As a web designer, building a strong design portfolio is crucial to showcase your skills, experience, and creativity to potential clients or employers.
People want to see what you can do and what you’ve done, before they will even think of hiring you.
Why?
Because while having a degree or certification in web design is helpful, nothing can demonstrate your capabilities quite like a portfolio filled with impressive projects.
A high quality design portfolio is not just good for getting hired though.
Spending time working on practice projects is an excellent way to improve your design skills and develop confidence, while also giving you the space to explore different techniques and styles.
Is your portfolio pretty thin? Well, don’t worry because in this guide, I'm going to give you 8 different design practice project ideas that you can use to stand out and close clients.
So let’s dive in…
The Design Process
Before I get into each of the projects, let’s quickly recap the design process.
If you just want to check the design projects, scroll back up and click the link to that section.
Still with me? Awesome. So why talk about the design process first?
Because following a proper design process will not only make you a better designer and improve your communication with your client. But it's also the process that will be expected of you when you're working in the industry so why not practice it now.
Not only is it a good habit to start early, but actually showing the steps of this process as part of your design portfolio is a key element that separates mediocre design portfolios from the best.
Having been a Product Design Leader for 10+ years, I've seen a LOT of portfolios, so trust me on this one. You really can't 'fake it' when it comes to a portfolio.
I actually talked about this and 60 other design questions in this interview below, so feel free to check that out:
Makes sense? Alright, let’s break it down.
The design process is a systematic approach used to create new products or improve existing ones.
It’s important because it allows for the creation of products, services, or systems that are functional, aesthetically pleasing, and meet the needs of their intended users.
Here are the high-level steps involved in the product design process.
Step #1. Define the problem
Start by defining the problem that the product, or new design, will solve. This involves identifying the user’s needs, their pain points, and opportunities for improvement.

I learned the hard way by starting so many projects without properly defining the problem. That meant designing with just assumptions because I didn’t properly capture what the user needs, pain points and opportunities for improvements were.
Ultimately, this is a dangerous recipe which often leads to products that miss the mark, and I would hate for you to be stuck in the same situation!
Step #2. Conduct user research
Your goal here is to learn more about the target audience, the industry, and the competitors. This includes gathering feedback from users through surveys, interviews, and usability testing.
It could also include a thorough analysis of an existing product or a competitor’s product, including features, user interface, user flow, and usability.
You should aim to identify its strengths and weaknesses.

I personally take research very seriously but have witnessed other teams in the past bypass the entire process and go straight to development from design...
This often leads to users struggling to find basic features of a confusing experience that doesn’t resonate with them, and at this point, the team is often forced to go right back to the drawing board to conduct some proper user and competitor research.
Make sure you don't skip this step!
Step #3. Set goals for your project
Now that you have an idea of what's needed for your project, you should set clear design goals that:
- Align with the user’s needs
- Their business goals
- And the design problems you’ve identified
These goals should guide your design decisions and help you prioritize features and design elements and not get off track or miss anything important.

During my time working as a product designer, I always felt that this step was the most often overlooked.
In the past, setting clear goals that aligned both user and business needs have helped me ensure that the solution our team built was hitting the mark for our target audience and the business.
This could be anything like generating more revenue or having your target users acting in a way that benefits the business.
Editor's note: This is actually a common problem in client work. The client often wants something, but doesn't know the specifics of it, and how it ties in. Maybe they want their website to 'look good' but in reality, they want to look better than competitors while also getting more sales. Sometimes it means tweaking the project to meet the real goal.
Clarity on the goal will save you a lot of heartache in the long run.
Step #4. Develop user personas
User personas are fictional representations of the target audience that helps designers understand the users' goals, needs, and behavior patterns.
Your goal here is to try and understand who this product is for, so you can make sure you meet their needs and aesthetics.
You can also add additional information such as user demographics.
Important: Be careful when creating user personas that you don't make this common mistake!
Many Junior Product Designers make this one mistake at least once, and I was also guilty of it. Back when I was working at one of my first gigs, I spent hours “researching” and crafting a detailed set of personas.
When I presented them to my team for review, one persona was met with some laughter. It turned out that I had unknowingly based one of the personas on myself, complete with my name, interests, and behavior patterns!
We all have a tendency to design for ourselves, and it was a humorous reminder to step back and ensure that our designs truly meet the needs of our actual users.
Step #5. Ideate and sketch

This involves brainstorming ideas and sketching out concepts.
The goal is to generate a variety of potential solutions that address and solve the problem defined at the beginning of the design process.
Use sketches and wireframes to explore different design solutions and test out ideas. Focus on creating a clean, intuitive interface that guides users through the product.
Don't jump right into the design tools though!
Every time I begin working on a new feature or project, I always start with sketching my concepts first, in either a notebook or on my tablet.
Why?
Because jumping right into Figma is going to stunt your creativity, whereas sketching will allow you to easily create and iterate on potential concepts very quickly.
I often like to use my tablet to sketch and send those concepts to Figma but if I feel like using my notebook I will often quickly snap a picture of the sketch I want to refine and then continue my work in Figma
Step #6. Prototype your designs
Now is the time to actually start creating, and start building prototypes to test and refine your new design.
This can include low-fidelity prototypes such as paper sketches or high-fidelity prototypes that resemble the final product.
A key thing to remember is that your prototypes should help map out how users navigate through the product. You should also identify areas where users might get stuck or confused, and look for opportunities to streamline the user experience.
If you aren’t prototyping, are you even a product (UI/UX) designer?
Seriously though, I do this almost every day because I really value the ability to see how an interaction plays out versus trying to verbally illustrate it to my team members.
Creating prototypes can speed up the design review process and get you back iterating on your designs without the worry of wasted time.
Step #7. Test and iterate

Now that your prototype is complete, test it with users and gather feedback. Then use this feedback to refine the design and create new iterations of your prototypes.
Remember, test early and often, and make adjustments as needed to ensure that your design meets the needs of users.
Your first solution will most likely not be the best solution, and that’s fine.
Combining your existing research of your target user/s and the landscape will get you close but you still need to ensure that your solution balances all of your design goals.
I generally work very closely with our team to test prototypes and designs and then take our best concepts into user interviews and usability tests with the goal of figuring out if target users can easily navigate the design and perform the tasks requested of them.
I will then take that feedback back to my team, incorporate the changes that we agree on and test again.
You shouldn’t stop until you feel like your solution has succeeded in usability testing, meets user needs and addresses user pain points.
Step #8. Create high-fidelity designs and implementation
Once the design has been refined and tested, it's time to finalize and implement the final design.
At this point you should create high-fidelity designs while paying attention to typography, color, and other design elements that can enhance the user experience.
Also remember, that when you’re working with developers, you should create detailed specifications for the designs to aid in the handoff.
When working with my design team, I have always stressed that you should properly document your designs and create any artifacts that will help the development team implement with ease.
As a Junior Designer, I made the mistake of rushing this last bit of the process which did cause some confusion and misinterpretation of the final designs and interactions.
Watch the workshop below to learn more about the designer to developer handoff, especially if this isn't something you've done before:
You likely won't be working with a dev for these practice projects, but it’s still a good habit to start adding your design notes now.
This is all part of showing clients and future employers your communication skills. The easier you make it for the developer, the fastest the feature can get built. That makes the company happy :)

The product design process is iterative, meaning that each step builds on the previous one so don’t be surprised if you need to go back and revise your work based on feedback or changes in project goals.
The importance of using fundamentals
So that’s the 8 steps of the design process. It’s a fairly simple, systematic approach that you can use to make sure that you create products that meet the needs of their users and stand out in the market.
Although you could technically just jump into any of the projects below and design however you want, I highly recommend that you follow this process, and also document your steps.
This way, you can then share details around the ‘background’ of each project, to help potential clients see the changes or design choices you made.
One last thing before we get into the projects, and that's the differences between a good portfolio and a bad one...
What's the difference between a good portfolio and a bad one?
I talk about this in detail in the video interview below. If you click play it should start you right to section where we discussed this (around ~1:26:00 in).
But for those who prefer to read, let me summarize the differences.
Bad portfolios usually have one or all of the following:
- Limited design work to show
- Low range of design skills
- Difficult or bad portfolio navigation
- Poor presentation
For example
You might only have one major project on display in your portfolio, and it's a mobile project.
If you were applying for new mobile projects, this would be kind of ok, but if you were applying for work in other areas, it gives the appearance of a lack of skill range.
Whereas a good portfolio is pretty much the opposite of this.
A good portfolio will almost always have:
- Well-presented designs that help give context and narrative to what you were working on and learning
- Easy and obvious navigation between these projects. They show the interviewer how it all ties together and moves them along
- You talk about your design process and what you did. What were the problems? How did you solve them? What was your process? What was the outcome? Did you innovate anything? What did you learn? All of this shows key skills
- Have multiple projects on display. Even if you're applying for a specific position, you then have projects that all tie into this, so people can see your range of skills in that area
For a truly exceptional portfolio, you should have all of the above, and also:
- Have some standout projects that will wow the interviewer by showing the depth of your skills
- Add your own style and flair to the portfolio, so that it stands out against your peers
As you can see, a lot of this ties into what we've been talking about so far. Context, process, outcomes, and learnings are all huge. They show the interviewer that you can adapt and work through the tasks to create your kick-ass work.
They don't just want a skilled artist. They need a proactive team member who can figure things out!
For example
Here's a great portfolio that the designer has customized.

Notice how they break down their process and outcomes also.
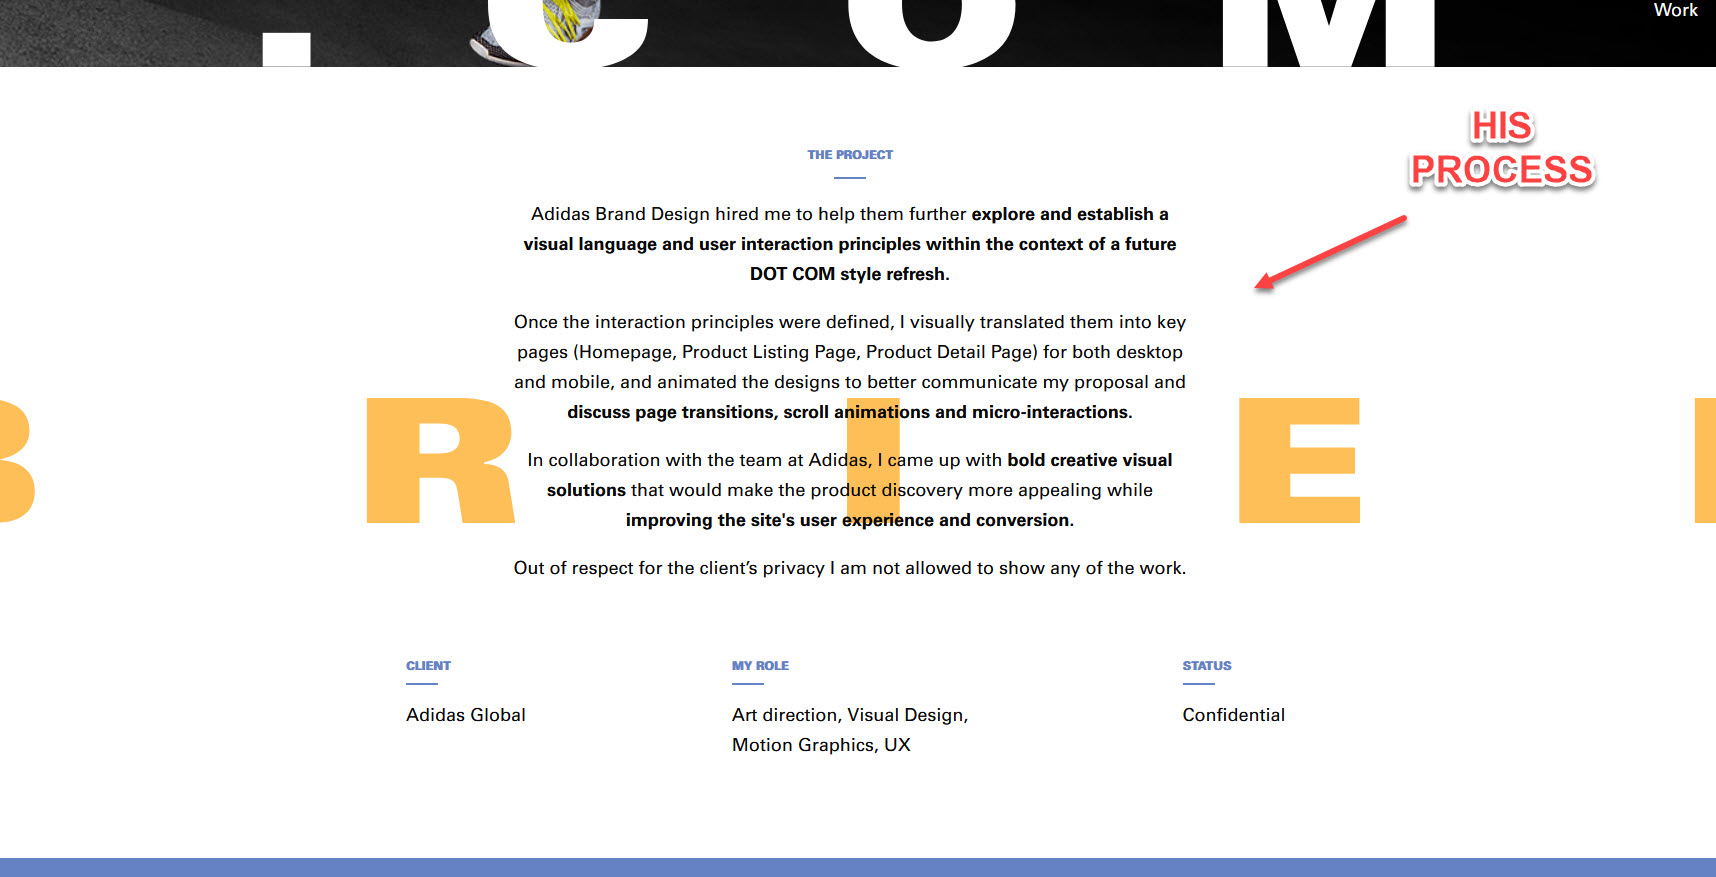
It's great work, and it helps the viewer move through and find everything they need to know.
So now that you know what you need to do for a kick-ass portfolio, let’s get designing!
8 design project ideas to create a killer portfolio & practice your design skills
Project #1. Redesign an existing product

Redesigning an existing product can be a challenging task, but it can also be a great opportunity to showcase your skills in information architecture, user interface design, and user experience design.
So what should you redesign?
How about:
-
A popular social media app is experiencing a decline in user engagement and retention. The company decides to undertake a redesign project to improve the user experience and re-engage users. Can you redesign it?
-
Or a mobile app that provides users with weather information has received feedback that the interface is difficult to use and that the information provided is not always accurate. The company decides to undertake a redesign project to improve the app's usability and accuracy
Don’t want to work on either of those?
Why not pick a product or site you already use!? That way, you’re not only the perfect customer and know all about the product, but you also know where you would like to improve it.
Project #2. Create an app

Identify a problem that you or someone you know faces, and design a product to solve that problem.
Develop it all from scratch, from the initial concept to wireframes and high-fidelity prototypes. This will allow you to practice your skills in user research, ideation, prototyping, and user testing.
If you’re having trouble coming up with a problem to solve, take a look at a list of possible ideas for a new website or app:
-
A home improvement website that offers tutorials, product reviews, and design inspiration for DIY home renovation projects
-
A meal planning and grocery delivery app that creates customized meal plans based on users' dietary preferences and delivers ingredients to their doorstep
-
A travel planning website that helps users plan and book sustainable and eco-friendly trips
-
A mental health app that provides users with tools and resources for managing anxiety, depression, and other mental health conditions
-
An e-commerce platform for buying and selling sustainable and eco-friendly products
-
A language learning app that uses AI to personalize learning content and track progress
-
A social networking app that connects people with similar interests and facilitates local meetups
-
A fitness app that offers virtual personal training sessions and personalized workout plans
-
A job search website that uses AI to match job seekers with relevant job openings
-
A recipe-sharing website that allows users to upload and share their favorite recipes with a community of home cooks
You don’t need to create all the backend code. Simply have the working prototypes, and perform the necessary research.
Project #3. Design a landing page

Design a landing page for a product or service, focusing on conversion optimization and user engagement.
This will allow you to practice your skills in visual design, copywriting, and user experience design.
Editor's note: Some copywriters and designers earn 5 figures per landing page, so having this skill is more beneficial than you might think!
This is a great example of skill stacking which I highly recommend. In fact, we recently created a video on just this topic 👇
Haven’t designed a landing page before? Don’t sweat it, these are some of the sections that you will encounter and should include:
Hero section:
This section is very important and comes first at the top of the page. It contains the following:
- A short, attention-grabbing headline that clearly communicates the purpose of the landing page and its value proposition
- A sub headline that provides additional information and context about the product or service being offered
- A clear and compelling Call-to-Action (CTA) that encourages users to take the desired action, such as signing up for a free trial, making a purchase, or downloading an ebook
- A high-quality image or video that showcases the product or service and helps to reinforce its value proposition.
Benefits section: A list of the key benefits or features of the product or service being offered, presented in a clear and concise manner.
Social Proof section: Testimonials, customer reviews, and other forms of social proof that demonstrate the value and effectiveness of the product or service.
FAQ section: Frequently Asked Questions section that addresses common questions or concerns users may have about the product or service.
Trust Elements: Elements that help build trust and credibility with users, such as security badges, customer logos, and satisfaction guarantees.
Contact Information: Clear contact information, such as a phone number or email address, that users can use to get in touch with the company if they have any questions or concerns.
Footer: A footer section that includes links to other pages on the website, social media profiles, and copyright information.

If you’re looking for some topics to get your creative juices pumping, how about:
-
A product launch landing page that introduces a new product, highlights its features and benefits, and encourages users to sign up for updates or make a purchase
-
An event landing page that promotes a conference, seminar, or webinar, provides details about the event schedule and speakers, and allows users to register or purchase tickets
-
A lead generation landing page that offers a free resource, such as an e-book or white paper, in exchange for users' contact information
-
A crowdfunding landing page that showcases a new product or project and encourages users to make a contribution or pledge their support
-
A pre-launch landing page that generates buzz and anticipation for an upcoming product or service by offering sneak peeks or behind-the-scenes content
-
An app download landing page that promotes a mobile app and encourages users to download it from the app store
Project #4. Create an interactive prototype

Develop an interactive prototype for a website or app using a prototyping tool like Figma or Adobe XD.
This will allow you to practice your skills in user interface design, user experience design, and interaction design.
Here are some things that you can try and prototype to showcase your amazing skills:
- User interfaces:
Prototype the user interface of software applications, websites, and mobile apps, testing and refining the layout, navigation, and overall user experience.
- Interactions:
Prototype interactions such as button clicks, form submissions, hover states, transitions and dropdown menus.
- Responsive versions:
You can create prototypes that adjust to different screen sizes and orientations, testing the usability of a design across different devices.
If you don’t know how to use Figma, check out my beginner friendly UI/UX Design Bootcamp course here.
Project #5. Create a component library or design system

Design a component library or design system that outlines the visual elements, typography, colors, and other design components of a brand or product.

This project can demonstrate your ability to create consistent and cohesive designs that align with your brand identity and business goals.
⚡ Bonus: You can pair this project with other practice project types like a redesign or a new product!⚡
Design systems and component libraries generally have the following elements:
- Brand guidelines:
Design systems often include guidelines for maintaining consistency with a brand's visual identity, including color palettes, typography, and iconography, and foundational styles and components.
- Typography styles:
Component libraries may include typography styles, such as font families, font sizes, and line heights, that help designers maintain consistency with a brand's visual identity.
- Color styles:
Component libraries may include a set of predefined color swatches and color schemes that help designers maintain consistency with a brand's color palette.
- Icons and illustrations:
Component libraries may include a set of icons and illustrations that can be used across different digital products to create a consistent visual language.
- UI components:
Component libraries often include a variety of UI components, such as buttons, form fields, dropdowns, and icons, that can be used to build digital products.
- Layout components:
Component libraries may include layout components, such as grids, cards, and tabs, that help designers create consistent layouts across different digital products.
Project #6. Participate in design challenges

Design challenges are briefs or prompts that ask you to design a product or solve a design problem within a limited timeframe.
They allow you to demonstrate your ability to work under pressure, iterate quickly, and come up with creative solutions.
Here are some great design challenges:
Go ahead and give them a try!
Project #7. Design a dashboard

Create a dashboard or data visualization that helps users understand complex data or information.
This project can demonstrate your ability to create intuitive and effective data visualizations that make complex information more accessible and easy to understand.
Some products or websites that may feature a dashboard or data visualization could be:
-
Financial dashboard: Design a dashboard for a financial company that displays real-time data about stock prices, exchange rates, and other financial metrics. Include features such as interactive charts and graphs, customizable data visualization options, and user-friendly navigation
-
Health and wellness dashboard:
Design a dashboard for a health and wellness app that allows users to track their fitness goals, monitor their food intake, and view their progress over time. Include features such as personalized recommendations, motivational messages, and easy-to-understand data visualizations
- Social media analytics dashboard:
Design a dashboard for a social media analytics tool that helps businesses track their social media performance, including metrics such as engagement, reach, and follower growth. Include features such as customizable reports, real-time data updates, and easy-to-use filters and sorting options
- Energy consumption dashboard:
Design a dashboard for a smart home energy management system that allows users to monitor and control their energy consumption in real-time. Include features such as energy usage breakdowns, customizable alerts and notifications, and easy-to-understand data visualizations
- Transportation analytics dashboard:
Design a dashboard for a transportation company that displays real-time data about vehicle routes, traffic patterns, and other transportation metrics. Include features such as customizable maps, data visualizations that highlight trends and patterns, and real-time data updates
- Climate change dashboard:
Design a dashboard that displays real-time data about climate change and its impact on the planet. Include features such as interactive maps, data visualizations that highlight trends and patterns, and educational resources about climate change and its solutions
Project #8. Design a responsive website

Design a website that can adapt to different screen sizes, such as desktop, tablet, and mobile.
This project can demonstrate your ability to design interfaces that are both functional and visually appealing across multiple devices.
This isn't just any Figma practice project. The project above takes you on a journey from initial client brief to a captivating website design, encompassing the entire design process from concept, to execution, to handoff!
You don't have to build an airbnb clone though. You could follow the same process and build any type of site.
For example
Below is a list of possible responsive projects and what you should aim to focus on in each one.
- E-commerce website:
Design a responsive website for an online store that sells a specific type of product, such as clothing, electronics, or books. The website should be optimized for different devices, including desktops, laptops, tablets, and smartphones
- Portfolio website:
Design a responsive website for a freelancer or creative professional that showcases their work and skills. The website should feature an intuitive navigation system and highlight the designer's unique style and personality
- News website:
Design a responsive website for a news outlet that covers a specific topic or region. The website should prioritize readability and ease of navigation, with a clear hierarchy of content and sections
- Educational website:
Design a responsive website for an educational institution or online learning platform that provides courses and resources for learners of all ages. The website should be optimized for different devices and feature interactive learning tools and engaging multimedia content.
- Travel website:
Design a responsive website for a travel company that offers tours and experiences in different locations around the world. The website should feature stunning photography, an easy-to-use booking system, and responsive design elements that enhance the user experience on different devices
- Food blog website:
Design a responsive website for a food blogger or recipe website that provides recipes, cooking tips, and food-related content. The website should feature high-quality food photography, an easy-to-use recipe search function, and responsive design elements that enhance the user experience on different devices
Heck, why not build one of each and work through the entire client process as if working with a clinet. That way you can not only show off multiple site designs, but also your entire design process.
This is the kind of thing that stands out with potential employers!
It’s time to get to work!
So there you have it. 8 design project ideas that are the exact types of projects you'll be asked to do as a full-time designer.
Hopefully, I’ve inspired you to get pen to paper and start working on your next portfolio piece!
Practicing as a web designer really is crucial for developing and refining your skills, staying up-to-date with industry trends, building your portfolio, learning from feedback, and collaborating effectively with others.
By working on a variety of projects and receiving feedback from peers and users, you'll also be able to improve your design thinking and problem-solving abilities, showcase your skills to potential employers, and create successful design solutions that meet the needs of all stakeholders.
Whether you're a beginner or an experienced designer, continuous practice and learning are essential for success in the ever-evolving field of web design.
But if you are a beginner looking to get hired... focus on quality over quantity.
- Focus on creating 2-3 projects from this list to put on your design portfolio
- But for each project, also include details documenting each step of the design process and how you made the decisions you did
If you do this, I can guarantee you that you will land multiple interviews, no problem at all.
Want to see what that looks like? Check out Laura Walters portfolio (she's the Lead Designer for Zero To Mastery). She does a great job with this.
Final thing...
If you want to do a deep dive into mastering Figma, UX/UI design, mobile design, and more, come check out my Complete Design Bootcamp course.
You can even start this with no prior design or coding knowledge. I’ll walk you through everything you need to do and know to get hired as a UI/UX Designer.
Heck... I even share the first 6 hours of the course in the video below, completely for free, so you have no excuse to get started now!


