AI WEEK IS HERE: See All New AI Courses here.
Use Code: LEARNAI to get 21% OFF any membership. Expires soon 👇
06DAYS09HOURS18MINS22SECS
Back to courses

Unity Bootcamp: 3D Game Development

Learn Unity. Get Hired. This is the only Unity course you need to go from complete beginner (no coding experience) to coding your own 3D games and getting hired as a Game Developer this year!

38 Days

Average time students take to complete this course.

instructor
Taught by: Luis Ramirez Jr
Last updated: April 2024

Course overview

We guarantee you that this is the most comprehensive and up-to-date 3D Game Development Bootcamp to go from absolute beginner to mastering Unity and getting hired as a 3D Game Developer, Unity Engineer, or Unity Developer.

What you'll learn

  • Learn Unity from scratch (one of the top cross-platform game engines for creating professional 3D games)
  • Learn the C# programming language from scratch, including namespaces, classes, variables, functions and much more
  • Step-by-step process from creating your own game to publishing it online
  • Build a story-driven game with your own story, dialogue, music, and even cutscenes
  • How to use Unity to easily create and deploy games across multiple platforms including Windows, MacOS, iOS, Android, and many more
  • Create an RPG game with quests, rewards, potions, a combat system, weapon upgrades, and more
  • How to build games with all the bells and whistles of your favorite games
  • Use a keyboard or add your preferred controller (Nintendo Switch, XBOX, Playstation) to move your characters
  • How to launch your career as a 3D Game Developer, Unity Engineer, or Unity Developer

Learning to build your own 3D video game shouldn't even feel like learning... it should be a blast! That's exactly what you're about to experience with this Unity Bootcamp.

While learning the latest version of Unity, you are actually going to build a professional-level 3D game with a custom storyline, quests, rewards, a combat system, AI enemies, dialogue, music, cinematics, and much more using game development best practices for 2024.

By the end of this course you'll actually publish your first game for the world to play!

But it won't just any game. It'll be a game that's built using the most up-to-date, accurate information. Your instructor (Luis) is dedicated to making sure you learn the skills to become a Top 10% Game Developer.

In fact, this course is constantly updated and will be your go-to source for Unity and 3D game development during your career.

Finally... your days of wasting time and bouncing between confusing, out-of-date, incomplete tutorials are OVER.

By enrolling today, you’ll also get to join our exclusive live online community classroom on Discord where you'll learn alongside thousands of students, alumni, mentors, TAs and Instructors.

Most importantly, you'll be learning from a senior industry professional that has actual real-world experience with Unity game development and the C# programming language.

Why Learn Unity?

First perhaps we should answer - what is Unity?

Unity is an industry-leading, cross-platform game engine that is commonly used for creating 3D, 2D, AR, and VR games. It's a powerful tool that allows you to easily create and deploy games across a wide range of platforms and devices.

If you've played any video games (if you're here, we assume you have), then we're willing to bet that you've played a video game built using Unity... and now you can learn how they're made and build your own.

Why has Unity become so popular to use?

  1. Unity offers a wide range of features and tools that make the game development process user-friendly
  2. It has built-in physics systems, animation systems, and supports a wide range of third-party assets and tools so that you can build anything your imagination can create
  3. There's a large community of developers who contribute to Unity's development, so it's constantly improving and staying at the leading edge of game development.

These reasons are also a big part of what makes candidiates with Unity skills so in-demand.

Why Become a Unity Game Developer?

We could write a whole post but we'll keep things simple here.

The gaming industry is a huge business. And just the movie and TV business, it's all about being the company to create the next big hit.

That means top gaming companies like Rockstar Games, Electronic Arts, Activision Blizzard, Roblox, and Ubisoft are all seeking to hire Unity Developers to help them be the one to make the next big video game.

Because of this, you'll also be well-paid to build (and play!) video games.

As we're writing this, the average Game Developer is earning ~US$80,000.

With the in-demand skills learned in this bootcamp, you'll be ready to launch your career as a Unity Developer, Unity Engineer, or 3D Game Developer.

Here's what this Unity Bootcamp covers:

This course will take you from complete beginner to building your own game from scratch by:

  • Teaching you the most up-to-date information and best practices
  • Using hands-on exercises where you put the theory into practice
  • Working through the entire game development process from ideation to coding to publishing

Oh and you'll be learning from a world-class ZTM instructor: Luis Ramirez, an industry professional with over 10+ years of experience.

Let's dive into the details of exactly what you'll learn in this Unity 3D Game Development Bootcamp:

1. Getting Started

Don't know anything about programming or game development? Don't know Unity from Unreal? Have no fear! We'll start out by teaching you about what a game engine is and how to install Unity.

2. Unity Fundamentals

You'll learn the most crucial beginner topics related to Unity, including managing projects with the Unity Hub, customizing the editor interface, creating scenes, manipulating game objects, modifying the surface of a game object with materials, using prefabs for reusing game objects, and exploring components.

3. Designing a Scene

Now it's time to get your hands dirty by designing a level with Unity's tools, including Unity's Grid system and poly brush packages. You'll download an asset pack with everything you'll need for designing models, plus learn about FBX files and how to import models into Unity. This will give you an opportunity to become a master of Unity's package ecosystem.

4. Getting Started with C#

The Unity Engine primarily uses the C# programming language. But if you're a complete programming beginner... no problem.

You're going to learn C# right from the beginning, starting with basic topics such as namespaces, classes, properties/variables, functions, controlling the flow of logic, inheritance, and constructor functions. Plus it'll all be done step-by-step so you'll be able to follow along.

5. Player Movement

Learn how to move objects by using Unity's brand-new package called the Input System. We'll start with a keyboard, but you can add your preferred controller (Nintendo Switch, Xbox, Playstation) to move your characters.

Plus you'll learn to restrict movement and understand how movement can be constrained to specific areas on a map by using the navmesh agent.

6. Intermediate C#

Time to dive back into C# and continue your journey to mastering the C# programming language by learning how to create instances, use abstract classes to enforce a specific implementation, and use static classes to help outsource utility logic.

7. AI Movement

You'll learn how to move enemies with Artificial Intelligence and bring your NPCs (non-player characters) to life! Plus your enemies will be able to do all the classic things you're used to seeing them do in video games such as chase, guard, and initiate attacks on players.

8. Patrolling with Splines

Further improve your AI characters by adding patrolling behavior around the map. This section will introduce the splines package for creating a fixed path on a map. You'll also learn about rotations, pausing, and using the State pattern for toggling between behaviors.

9. Player & Enemy Stats

Learn how to apply stats to characters by using Scriptable objects. Scriptable objects make it easier for designers to test and balance a game quickly, and utilizing this feature to its fullest will help you understand the importance of collaboration.

10. Animation

Bring your game to life with animations! You'll be able to apply idle, walking, running, death, and attack animations to your characters. Fundamental animation concepts such as keyframes and blend trees are covered, plus programmatically-trigger animations from your components.

11. Combat

It's time to fight! But how do your characters actually dish out and incur damage? Well, you'll use events to communicate damage to other characters. Raycasting will be used to help detect when a character has been attacked, and you'll also use gizmos to help you visualize the chase and attack range of enemies.

12. User Interfaces

Creating a great UI is key to any game. Everyone has played a video game before with a bad UI, and it sucks. So you'll add a UI to your game by using the Unity Toolkit package and customize your interface with Unity's template and USS systems.

You'll learn to position elements, modify their appearance, apply images, and dynamically render different elements. Navigation will be possible with keyboard or external controllers. Once it's all ready, you'll add the interface as an overlay to your game.

13. Dialogue

A great story is what will help make your game come alive. You can make players laugh, cry, and everything in between. That's why you'll learn how to use Ink, a tool for building a narrative-driven game. You'll even write your own story, build custom story paths, and add NPCs for handling the dialogue!

14. Quests & Rewards

Every good story starts with our hero embarking on a quest. That's why you'll learn how to add a quest system and apply awards to players, from adding potions, increasing health, and even upgrading weapons. This process will involve using enums for keeping track of available weapons, toggling active game objects, and binding functions to dialogue events.

15. Scene Management

Next you'll learn how to transition from different scenes by using collision detection and Unity’s scene management class.

16. Saving

Nobody wants to lose their hard-earned progress! So you'll learn how to allow players to save their data, such as their current position and stats. Data will be persisted across page refreshes and data can be reset upon victory or defeat. Plus you'll leverage Unity’s player preferences class to save data locally on a player’s machine.

17. Lights, Camera, Action!

This is where you will really make your game professional-level. You'll add that "wow" factor to your game by using Cinemachine to create cutscenes and share it with others. Cameras will be set up around the scene that can be easily transitioned from one another. You'll even learn how to play our cinematic scenes programmatically with collision detection.

18. Audio

Bring emotion to your game by learning how to add sound effects and music! . Audio can be dynamically played during events such as attacks or defeats, and even learn to fade out music while transitioning to a new scene - we've thought of everything!

19. Polishing Your Game

Time to add some finishing touches to your game. A variety of topics are covered here such as freezing time, adding vegetation, rotating cameras, adding skyboxes, and supporting additional input devices such as Nintendo Switch Pro Controllers.

20. Publishing Your Game

It's time to share your creation with the world! You'll learn how to publish your game and share it with the community. All your hard work has paid off and you can sit back and watch the community purchase and play your very first video game!

Bonus: This course, like all Zero To Mastery courses, is constantly updated... unlike many other courses out there (be careful out there).

As the Unity ecosystem evolves, this course evolves.

Luis continually updates the course with new lectures, projects, and resources. This is your go-to place to find and learn the latest game development best practices as you develop and grow your career.

What's the bottom line?

This course is not about making you just follow along so that when you are done with the course you don’t know what to do other than watch another tutorial.

Instead, this course will push you and challenge you to go from a beginner to a top 10% Game Developer / Unity Engineer 💪.

And... you have nothing to lose.

You can start learning right now and if this course isn't everything you expected, we'll refund you 100% within 30 days. No hassles and no questions asked.

When's the best time to get started? Today!

There's never a bad time to learn in-demand skills. But the sooner, the better. So start learning Unity today by joining the ZTM Academy. You'll have a clear roadmap to build your own games, get hired, and advance your career.

Join Zero To Mastery Now
What you'll build

The best way you learn is by doing. Not just watching endless tutorials. That's why a key part of this course is building & publishing a real-world game from scratch. Plus it'll look great on your portfolio.

RPG Game: Bruno's Island Adventure

RPG Game: Bruno's Island Adventure

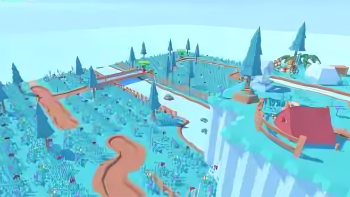
Build an RPG featuring Bruno stranded on a mysterious island and in a fight to survive. Your game will include a quest system, player stats, combat, dialogue, movement, scene transitions, audio, menu system, saving player data and even cinematic scenes.

Join Zero To Mastery Now

Course curriculum

To make sure this course is a good fit for you, you can start learning Unity Game Development for free right now by clicking any of the PREVIEW links below.

Introduction

5 lectures

Unity Bootcamp: 3D Game Development2:46

PREVIEW

Exercise: Meet Your Classmates and Instructor

PREVIEW

Understanding Your Video Player (notes, video speed, subtitles + more)

PREVIEW

Course Resources

PREVIEW

Set Your Learning Streak Goal

PREVIEW

Section 1: Getting Started

3 lectures

What Are We Creating?2:49

PREVIEW

What is Unity?1:34

PREVIEW

Installing Unity7:09

PREVIEW

Section 2: Unity Fundamentals

15 lectures

Creating a New Project5:29

PREVIEW

Custom Layouts4:08

PREVIEW

Default Windows Overview7:29

PREVIEW

Understanding Game Objects4:48

PREVIEW

Moving Around the Scene4:42

PREVIEW

Manipulating Game Objects5:20

PREVIEW

Exercise: Creating a Robot7:52

PREVIEW

Understanding Component Composition4:31

PREVIEW

The Transform Component2:28

PREVIEW

Applying Materials7:30

PREVIEW

Exercise: Materials1:44

PREVIEW

Parent and Children Objects5:42

PREVIEW

Prefabs7:43

PREVIEW

Final Tips and Tricks5:19

PREVIEW

Let's Have Some Fun (+ Free Resources)

PREVIEW

Section 3: Designing a Scene

17 lectures

Importing Unity Package Files2:48

PREVIEW

Model File Formats3:09

PREVIEW

Model Prefabs4:15

PREVIEW

Installing Packages with the Package Manager4:16

PREVIEW

Creating a 3D Tilemap9:15

PREVIEW

Changing the Materials on a Model2:16

PREVIEW

Extracting Materials from a Model4:01

PREVIEW

Adding an Offset to a Brush7:16

PREVIEW

Exercise: Installing the Polybrush Package1:55

PREVIEW

Painting Models with a Polybrush8:20

PREVIEW

Custom Icons for Game Objects7:06

PREVIEW

Exercise: Drawing More Tilemaps5:21

PREVIEW

Exercise: Adding a Slope3:08

PREVIEW

Rotating Tiles3:35

PREVIEW

Exercise: Rotating Corner Tiles3:21

PREVIEW

Where to Find Game Assets?2:04

PREVIEW

Unlimited Updates

PREVIEW

Section 4: Getting Started with C#

26 lectures

What is C#?2:57

PREVIEW

Installing Visual Studio Code4:40

PREVIEW

Configuring Visual Studio Code3:34

BEGIN

Creating a C# File3:13

BEGIN

Understanding Namespaces3:05

BEGIN

Creating a Namespace4:43

BEGIN

What are Objects?2:11

BEGIN

Creating Classes3:10

BEGIN

Understanding Variables3:33

BEGIN

Defining Variables4:47

BEGIN

Comments2:47

BEGIN

Constructor Methods3:48

BEGIN

Access Modifiers4:30

BEGIN

Inheritance Basics3:57

BEGIN

Using Namespaces1:37

BEGIN

Adding Classes as Components to Game Objects3:12

BEGIN

Custom Methods4:07

BEGIN

Parameters3:41

BEGIN

Return Values3:38

BEGIN

Control Flow7:02

BEGIN

Debug Class7:25

BEGIN

Generics7:39

BEGIN

Attributes6:01

BEGIN

Auto Formatting Code5:24

BEGIN

Exploring the C# Documentation2:00

BEGIN

Implement a New Life System

BEGIN

Section 5: Player Movement

28 lectures

Installing the Input System Package3:58

BEGIN

Understanding Actions and Action Maps1:42

BEGIN

Creating Actions and Action Maps3:53

BEGIN

Exercise: Creating a UI Action Map1:52

BEGIN

Setting the Action Type5:46

BEGIN

Adding Bindings4:41

BEGIN

Composite Bindings4:59

BEGIN

Separation of Concerns8:35

BEGIN

Event Handlers6:17

BEGIN

Adding a Game Manager3:16

BEGIN

Adding the Player Input Component7:14

BEGIN

Baking a Navigation Mesh8:36

BEGIN

Adjusting the Agent Size4:23

BEGIN

Adding Non-Walkable Areas3:34

BEGIN

The Navigation Mesh Agent Component4:47

BEGIN

Reading the Callback Context2:46

BEGIN

Storing the Movement Vector6:50

BEGIN

Grabbing a Component4:46

BEGIN

Moving an Agent5:10

BEGIN

Following the Player with a Camera8:04

BEGIN

Framerate Independence6:17

BEGIN

Using the Agent Speed2:24

BEGIN

Understanding Quaternion3:47

BEGIN

Vector Zero3:02

BEGIN

Linear Interpolation4:11

BEGIN

Component Catching and Organizing Code3:19

BEGIN

Exploring the Unity Documentation3:04

BEGIN

Course Check-In

BEGIN

Section 6: Intermediate C#

6 lectures

Creating Instances5:25

BEGIN

Static Modifier6:05

BEGIN

Understanding Abstract Classes3:02

BEGIN

Using an Abstract Class4:18

BEGIN

Using Abstract Classes as Types2:31

BEGIN

Base Constructor Methods3:08

BEGIN

Section 7: AI Movement

18 lectures

Prefab Variants5:26

BEGIN

Requiring Components4:00

BEGIN

Creating a Controller3:33

BEGIN

Serializing Fields4:54

BEGIN

Tags2:53

BEGIN

Using Constants4:26

BEGIN

Calculating Distance with Vectors6:27

BEGIN

Disabling Serialization2:23

BEGIN

Custom Gizmos3:57

BEGIN

Moving Agents by Destination6:23

BEGIN

Introduction to the State Pattern3:37

BEGIN

Creating a Base State4:53

BEGIN

Setting a Default State8:29

BEGIN

Creating a Return State3:19

BEGIN

Creating a Chase State6:19

BEGIN

Transitioning Between States6:11

BEGIN

Exercise: Creating an Attack State7:29

BEGIN

Stopping the Agent3:45

BEGIN

Section 8: Patrolling with Splines

17 lectures

Creating a Patrol Enemy4:15

BEGIN

Installing the Splines Package1:56

BEGIN

Adding Knots6:57

BEGIN

Adding Curved Knots4:44

BEGIN

Closing Knots2:46

BEGIN

Serializing Private Fields5:51

BEGIN

Moving Enemies to the Path7:51

BEGIN

Checking for a Missing Path3:45

BEGIN

Creating a Patrol State1:45

BEGIN

Verifying an Agent Reaching their Destination8:39

BEGIN

Calculating the Next Position4:56

BEGIN

Moving the Enemy on the Spline4:00

BEGIN

Grabbing the Spline Length1:48

BEGIN

Adjusting the Patrol Speed4:24

BEGIN

Pausing the Enemy on Patrols2:37

BEGIN

Toggling the Enemy's Patrol4:12

BEGIN

Extracting Models3:26

BEGIN

Section 9: Player & Enemy Stats

6 lectures

What is a Scriptable Object?1:37

BEGIN

Creating a Scriptable Object5:29

BEGIN

Configuring the Character's Stats3:36

BEGIN

Loading Enemy and Player Stats5:24

BEGIN

Applying Stats6:52

BEGIN

Updating the Speed3:10

BEGIN

Section 10: Animation

31 lectures

Updating Character Models6:07

BEGIN

Rotating Enemies Toward the Player3:57

BEGIN

Rotating Enemies Toward their Return Position4:32

BEGIN

Rotating Patrolling Enemies5:04

BEGIN

Rotating Enemy to Original Rotation3:20

BEGIN

Disabling an Agent's Rotation1:21

BEGIN

Adding a Treasure Chest2:37

BEGIN

Adding a Nav Mesh Obstacle1:55

BEGIN

Creating an Animation Clip4:52

BEGIN

Adding Keyframes4:47

BEGIN

Understanding the Animator Controller3:43

BEGIN

Adding an Idle State5:41

BEGIN

Animator Controller Parameters2:55

BEGIN

Adding a Box Collider5:19

BEGIN

Adding a Rigid Body1:44

BEGIN

Listening to Key Presses5:18

BEGIN

Updating Parameters on Animator Controllers4:09

BEGIN

Applying an Avatar Definition2:37

BEGIN

Preparing the Animator Controller4:21

BEGIN

Adding a Blend Tree4:33

BEGIN

Grabbing Components in Child Objects1:47

BEGIN

Checking the Callback Action3:20

BEGIN

Updating the Animator Speed3:31

BEGIN

Smoothening the Animator Speed3:17

BEGIN

Exercise: Using Constants for Animator Parameters3:09

BEGIN

Looping Animations from Models2:07

BEGIN

Adding Animation to Enemies4:39

BEGIN

Updating the Movement Speed of Enemies4:34

BEGIN

Custom Clamping5:24

BEGIN

Custom Tags3:17

BEGIN

Exercise: Imposter Syndrome2:55

BEGIN

Section 11: Combat

25 lectures

Trigger Parameters5:21

BEGIN

Setting a Trigger5:47

BEGIN

Custom Animation Events3:00

BEGIN

Bubbling Events7:27

BEGIN

Empty Lambda Expressions2:44

BEGIN

Capturing Bubbled Events3:57

BEGIN

The Event Keyword4:16

BEGIN

Preventing the Excessive Attacks2:24

BEGIN

Removing Event Handlers3:14

BEGIN

Exercise: Custom Hit Bubble Event4:14

BEGIN

Understanding Arrays2:03

BEGIN

Box Ray Casts4:50

BEGIN

Looping through Arrays4:17

BEGIN

Refining the Results3:14

BEGIN

Reducing Health Points2:36

BEGIN

Stopping the Enemies Animation1:10

BEGIN

Attacking the Player2:44

BEGIN

Looking at the Player2:06

BEGIN

Canceling the Attack2:48

BEGIN

Adding a Defeat Animation3:44

BEGIN

Handling the Player's Defeat3:28

BEGIN

Exercise: Tracking a Character's Defeated State2:28

BEGIN

Destroying Game Objects4:45

BEGIN

Checking the Player is Alive2:00

BEGIN

Handling the Enemy's Defeat7:00

BEGIN

Section 12: User Interfaces

39 lectures

Creating a Custom Scene3:29

BEGIN

Creating a UI Document7:09

BEGIN

Using a Visual Element6:43

BEGIN

Adding Text3:38

BEGIN

Unity Stylesheets6:13

BEGIN

Exercise: Extracting Text Styles2:51

BEGIN

Custom Fonts2:12

BEGIN

Centering Elements3:37

BEGIN

Adding Buttons8:50

BEGIN

Adding an Image3:33

BEGIN

UI Document Game Object1:34

BEGIN

Exercise: Binding UI Actions4:27

BEGIN

UI Base State5:56

BEGIN

Main Menu State5:52

BEGIN

Retrieving the Root Visual Element2:56

BEGIN

Understanding Lists2:36

BEGIN

Querying a List of Buttons6:01

BEGIN

Exercise: Handling Interaction Events5:36

BEGIN

Handling the Selection4:03

BEGIN

UI Navigation4:34

BEGIN

Ternary Operator6:21

BEGIN

Toggling Classes4:56

BEGIN

Scene Transition7:14

BEGIN

Creating the Player Info UI9:53

BEGIN

Loading the UI in Another Scene1:17

BEGIN

Toggling the UI's Display10:27

BEGIN

Observer Pattern3:28

BEGIN

Creating an Event Manager4:16

BEGIN

Null Conditional Operator2:29

BEGIN

Sending Data with Events4:07

BEGIN

Updating the Health Label5:21

BEGIN

Healing the Player5:35

BEGIN

Exercise: Updating the Potion Count UI6:53

BEGIN

Adding a Canvas4:22

BEGIN

Adding the Health Bar Image7:28

BEGIN

Slider Component2:36

BEGIN

Dynamically Updating the Slider4:45

BEGIN

Adding the Health Bar to the Enemy5:54

BEGIN

Creating a Billboard5:58

BEGIN

Section 13: Dialogue

23 lectures

Installing Ink3:59

BEGIN

Writing a Story6:04

BEGIN

Exercise: Adding More Knots2:00

BEGIN

Adding Multiple Choice3:22

BEGIN

Adding the NPC6:11

BEGIN

Toggling a Dialogue Icon8:15

BEGIN

Handling NPC Interaction3:38

BEGIN

Loading a Story6:10

BEGIN

Creating the Dialogue UI9:06

BEGIN

Dialogue UI State3:53

BEGIN

Exercise: Entering the Dialogue State7:18

BEGIN

Type Casting5:28

BEGIN

Displaying a Story's Text2:28

BEGIN

Switching Action Maps5:26

BEGIN

Continuing the Story2:32

BEGIN

Checking Story Choices3:46

BEGIN

Clearing Lists4:55

BEGIN

Looping through Lists with the ForEach Method2:44

BEGIN

Dynamically Creating Elements3:07

BEGIN

Setting the Active Choice4:04

BEGIN

Selecting a Choice3:07

BEGIN

Exiting the Dialogue3:03

BEGIN

Fixing a Few Bugs4:25

BEGIN

Section 14: Quests & Rewards

24 lectures

Creating a Quest Item UI7:59

BEGIN

Preparing the Quest Item State3:29

BEGIN

Exercise: Entering the Quest Item State4:07

BEGIN

Using Scriptable Objects for Quest Items4:59

BEGIN

Adding Tooltips2:11

BEGIN

Updating the UI Label6:12

BEGIN

Pausing Enemy Attacks6:52

BEGIN

Storing the Quest Item5:56

BEGIN

Displaying the Quest Item4:43

BEGIN

Configuring the NPC's Quest Item2:12

BEGIN

Binding External Functions4:46

BEGIN

Passing on the NPC5:15

BEGIN

Initiating the Quest Item Verification1:54

BEGIN

Checking the Player's Inventory7:00

BEGIN

Story Variables and Conditional Statements5:38

BEGIN

Manually Diverting Stories3:46

BEGIN

Creating a Reward Scriptable Object2:50

BEGIN

Understanding Enums2:51

BEGIN

Creating an Enum4:19

BEGIN

Creating a Reward Component3:20

BEGIN

Sending the Reward7:20

BEGIN

Applying Rewards3:41

BEGIN

Adding the Weapon's Model2:51

BEGIN

Setting Active Game Objects6:46

BEGIN

Section 15: Scene Management

6 lectures

Creating the Dungeon Scene7:33

BEGIN

Finishing the Dungeon Scene6:12

BEGIN

Creating a Portal1:40

BEGIN

Setting the Spawn Point2:10

BEGIN

Detecting the Player with Triggers4:42

BEGIN

Teleporting to the Next Scene5:16

BEGIN

Section 16: Saving

21 lectures

Adding a Portal Event6:00

BEGIN

Understanding PlayerPrefs3:19

BEGIN

Using PlayerPrefs6:38

BEGIN

Checking for Saved Data1:54

BEGIN

Retrieving Saved Data4:42

BEGIN

Dynamically Adding a New Button4:54

BEGIN

Loading the Correct Scene1:50

BEGIN

Deleting PlayerPrefs2:17

BEGIN

Warping an Agent7:06

BEGIN

Creating Enemy IDs4:00

BEGIN

Converting an Array to a List6:31

BEGIN

Checking for Defeated Enemies6:24

BEGIN

Joining Strings6:29

BEGIN

Splitting Strings6:16

BEGIN

Fixing the List4:34

BEGIN

Despawning Enemies4:19

BEGIN

Saving the Player's Quest Items4:52

BEGIN

Checking for Quest Items5:01

BEGIN

Stopping the Quest Item State5:17

BEGIN

Checking the NPCs for Quest Items6:57

BEGIN

Updating NPCs with Quest Items4:20

BEGIN

Section 17: Camera, Lights, Action!

13 lectures

Camera Priority2:48

BEGIN

Adding Virtual Cameras6:39

BEGIN

Creating a Sequence7:13

BEGIN

Camera Dolly6:58

BEGIN

Animating the Camera Dolly3:15

BEGIN

Creating a Cinematic Trigger3:47

BEGIN

Playing Sequences5:20

BEGIN

Playable Director Events3:53

BEGIN

Stopping Player Movement5:27

BEGIN

Toggling Booleans2:41

BEGIN

Adding the Enemy Boss8:22

BEGIN

Exercise: Creating a Cutscene6:57

BEGIN

Custom Awake Behavior4:14

BEGIN

Section 18: Audio

16 lectures

Audio Components5:45

BEGIN

Finding Audio3:01

BEGIN

Adding an Audio Clip2:15

BEGIN

Playing an Audio Clip3:19

BEGIN

Attack Sound Effect4:16

BEGIN

Attack Audio Event4:09

BEGIN

Treasure Chest Sound Effect3:45

BEGIN

Exercise: Reward Sound Effect3:15

BEGIN

Creating a Victor/Game Over UI4:47

BEGIN

Displaying the Victor/Game Over UI13:42

BEGIN

Storing Audio Clips2:30

BEGIN

Playing Audio for Game Completion6:02

BEGIN

Looping Audio3:44

BEGIN

Understanding Enumerators2:45

BEGIN

Using IEnumerator4:50

BEGIN

Fading Out Audio6:30

BEGIN

Section 19: Polishing the Game

13 lectures

Adding Weapons to Enemies2:14

BEGIN

Adding Pause States4:54

BEGIN

Toggling Pause Statess5:02

BEGIN

Preventing the Player from Pausing3:17

BEGIN

Setting the Time Scale3:00

BEGIN

Adding a Dirt Path3:44

BEGIN

Updating our Maps6:54

BEGIN

Baking the Navigation Mesh3:36

BEGIN

Adding an Ocean Plane4:27

BEGIN

Updating the Main Menu Scene1:18

BEGIN

Rotating the Camera Around a Point4:37

BEGIN

Skyboxes4:41

BEGIN

Supporting Additional Input Devices5:17

BEGIN

Section 20: Publishing a Game

2 lectures

WebGL Builds6:29

BEGIN

Publishing to Itch.io9:30

BEGIN

Where To Go From Here?

6 lectures

Thank You!1:17

BEGIN

Review This Course!

BEGIN

Become An Alumni

BEGIN

Learning Guideline

BEGIN

LinkedIn Endorsements

BEGIN

Coding Challenges

BEGIN

Meet your instructor

Your Unity Game Development instructor (Luis) isn't just an expert with years of real-world professional experience. He has been in your shoes. He makes learning fun. He makes complex topics feel simple. He will motivate you. He will push you. And he will go above and beyond to help you succeed.

Luis Ramirez Jr

Hi, I'm Luis Ramirez Jr!

Luis uses his 10+ years of experience in web application development to teach and guide new students to learn to code, get hired and become successful Software Engineers.

SEE MY BIO & COURSES

Luis Ramirez Jr

Frontend Developer

Frequently asked questions

Are there any prerequisites for this course?

  • No prior programming knowledge required. You will learn everything from scratch, including the C# programming language
  • All you need is a computer (Windows, Mac, or Linux) with an internet connection and a willingness and enthusiasm to learn Unity game development. That's it!

Who is this course for?

  • Anyone who wants to gain a complete and practical understanding of the Unity game engine without needing ANY prior programming knowledge
  • Anyone who wants to learn to build professional-level video games from scratch
  • Bootcamp or online game development tutorial graduates that want to go beyond the basics
  • Anyone who wants to launch their career as a Game Developer, Unity Engineer, Technical Artist, Game Designer, Technical Director, 3D Generalist, or VR/AR Developer
  • You want a step-by-step guide to learn how to code using the C# programming language from scratch all the way to being able to get hired at a top company as a Unity Engineer or Game Developer
  • Students who are frustrated with all of the beginner Unity tutorials out there that don't go beyond the basics and don't give you real-world practice or skills you need to actually get hired
  • You are a C# Developer who wants to use their skills for Unity game development
  • You want to learn Unity from someone with real-world experience

Do you provide a certificate of completion?

We definitely do and they are quite nice. You will also be able to add Zero To Mastery Academy to the education section of your LinkedIn profile as well.

Can I use the course projects in my portfolio?

Yes, you’d be crazy not to in our slightly biased opinion! All projects are downloadable and ready to use the minute you join.

Many of our students tell us the projects they built while following along with our courses were what got them interviews and because they built the projects themselves, they could confidently explain and walk through their work during the interview.

You know what that means? Job offer!

Are there subtitles?

Yes! We have high quality subtitles in 11 different languages: English, Spanish, French, German, Dutch, Romanian, Arabic, Hindi, Portuguese, Indonesian, and Japanese.

You can even adjust the text size, color, background and more so that the subtitles are perfect just for you!

Still have more questions about the Academy?

Still have more questions specific to the Academy membership? No problem, we answer some more here.

Invest in a better you. For less than a coffee a day.

Choose your currency:
$ USD US Dollar
Lifetime
100% OFF$999
$999
Only pay once, ever
You're serious about advancing your career and never getting left behind
Start Learning Now

MOST POPULAR

Save 40% vs. monthly (that's $189 a year)
Annual
100% OFF$279 / year
$23 / month
$279 / year
You're committed to getting hired and starting a career in tech
Start Learning Now
Monthly
100% OFF$39 / month
$39 / month
You're ready to upskill and advance your career
Start Learning Now

Every ZTM membership includes:

Unlimited access to all courses, projects + workshops, and career paths
Access to our private Discord with 400,000+ members
Access to our private LinkedIn networking group
Custom ZTM course completion certificates
Live career advice sessions with mentors, every month
Full access to all future courses, content, and features
100% RISK FREE

We know you'll love ZTM. That's why we provide a no hassle, 30-day money back guarantee.