


It’s fair to say that there are now many popular Javascript libraries that can enhance the potential workflow of React, and yes even though Redux can come off at first with a fair amount of overhead to implement!
Recent statistics indicate that over 1,000 companies reportedly use Redux in their tech stacks, including Instagram, Intuit, and Swat.io.
That being said, we don’t need to implement an architecture the size of Instagram nor clone its colossal nature in order to grasp the fundamental concepts of Redux (so don’t worry - we’ll have none of that)...
But by focusing on some of the main principals that makes Redux powerful along with its design system and flux pattern, we can lay down a solid foundation to getting started with Redux without losing track and getting lost in the overhead.
If you’re starting with Redux coming directly fresh from a beginner’s perspective learning state and hooks, it may be prudent to hit the breaks and slow down as we reflect on a new underlying architecture of efficient and lightweight (2kb total size) state management!
What are we going to build?
For this simplified Redux Tutorial with Code Example, we'll be using React and Redux to build a Front-end Movie App Demo with Api Fetch.
This will help you better understand Redux, how you can use Redux and why you should use Redux.
Editor's note: The tech industry moves incredibly fast, and it's important to stay up to date with the most recent information.
Both React and Redux have changed a lot in the years since this tutorial was written, and so although the ideas and theory behind this article are still relevant, the implementation in the tools may have changed slightly.
You can still follow this information and learn from it, but for the most up-to-date content and best practices we recommend you check out:
(Although this is a complete coding bootcamp, Andrei’s Redux section is amazing for beginners).
(Advanced React course where you build a massive E-commerce app with Redux, Hooks, GraphQL, ContextAPI, Stripe, Firebase).
The first important question we should ask ourselves before we begin is:
Why Redux?
Observe the infamous diagram below:

Two Application Examples with Components passing State
Ah the infamous Redux model on our left demonstrates that the more complicated our app gets, the more confusing it may become tracing and sharing states with other components in the child-parent state relationship model. We can easily see how this can get quite hairy with larger applications for when we have bugs and just keeping organized with data.
The model illustrating “With Redux”, however, shows how we can solve this problem. By creating a store that handles our state management, data flow can render more easily traceable and components listen to the data they are interested in. Much nicer and predictable.
With comprehensive and customizable middleware and fancy shmancy redux devtools in a redux environment, it becomes apparent as well of Redux’s value in simplifying the process of state management in larger applications.
React - Redux ‘Flux’ and Architecture
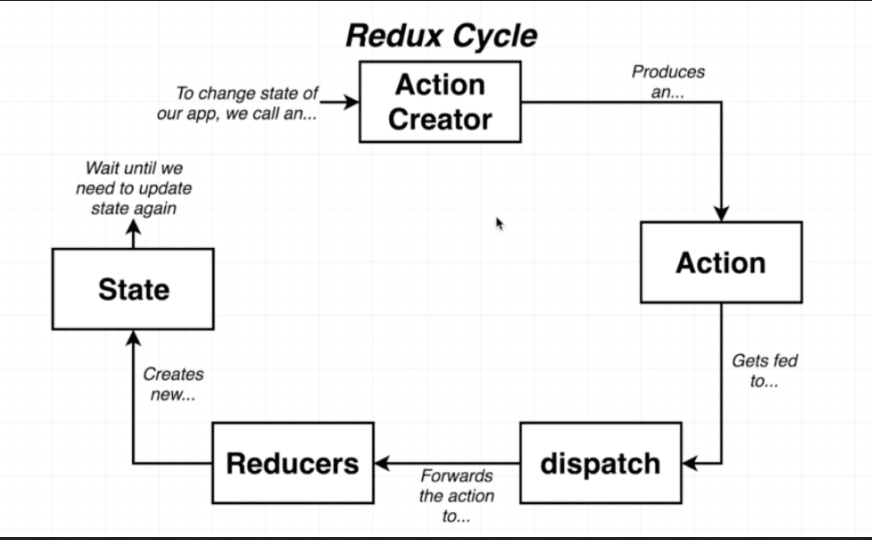
That leads us to our second milestone in grasping Redux core concepts before diving in: the cycle pattern of Redux.
 *Screen-cap from superhero Grider’s “Modern React with Redux”*
To Summarize:
ACTION: An object setting up information about our data moving into state.
DISPATCH: Functions which act as a bridge between our actions and reducers sending the information over to our application.
REDUCER: A function which receives data information from our action in the form of a type and payload and modifies the state based on additional provided data.
STATE: Where all the data from our reducers are passed into a central source.
We can now see that implementing a system to devise our data will give us a clearer level of control and power over our data flow. And this cycle, much like the cycle of life, is what makes this sweet baby go round. (Ok, that was a little dramatic just for fun).
The Store, Provider, and Connect
Store Once we have our Actions and Reducers set up everything is maintained in our Store. The Store is where we can set up our initial state, combine our reducers, apply middleware and hold our information.
Provider We can then use the Provider to wrap our store around our application and by doing so pass and render our state. We *can then use Connect *with a component and enabling it to receive Store state from the Provider.
So our Store File Architecture should looking something like this:
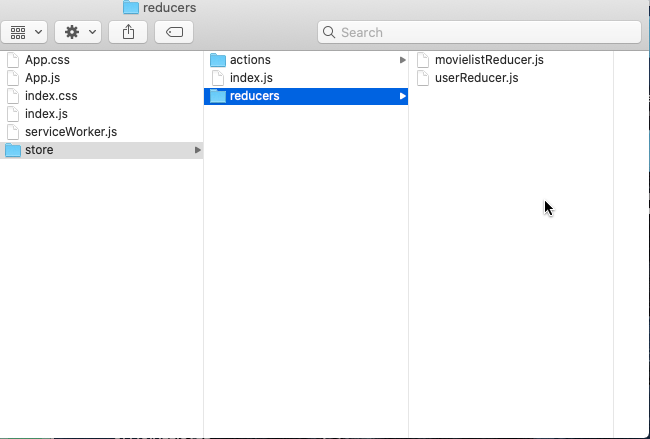
Redux is quite flexible when it comes to structuring set up. We will be aiming as always for isolated and clean file structure by creating a store folder with an actions folder and a reducers folder within. We’ll also have an index in our store folder to hook up our store and pass the reducers.
Ok, so enough with the jibbajabba… let’s start coding!
MOVIE LIST REACT - REDUX APPLICATION CODE
Let’s begin by using node in our terminal (for Macs) and creating our React App entitled redux-movielist with create-react-app
    cd desktop
    npx create-react-app redux-movielist
Next up, let’s go into the directory and install some of the packages which we will be using to enable the redux library. These will include redux, react-redux to connect react to redux, and redux-thunk, which we will be using to act as custom middleware for our async actions which we will see later on.
cd redux-movielist
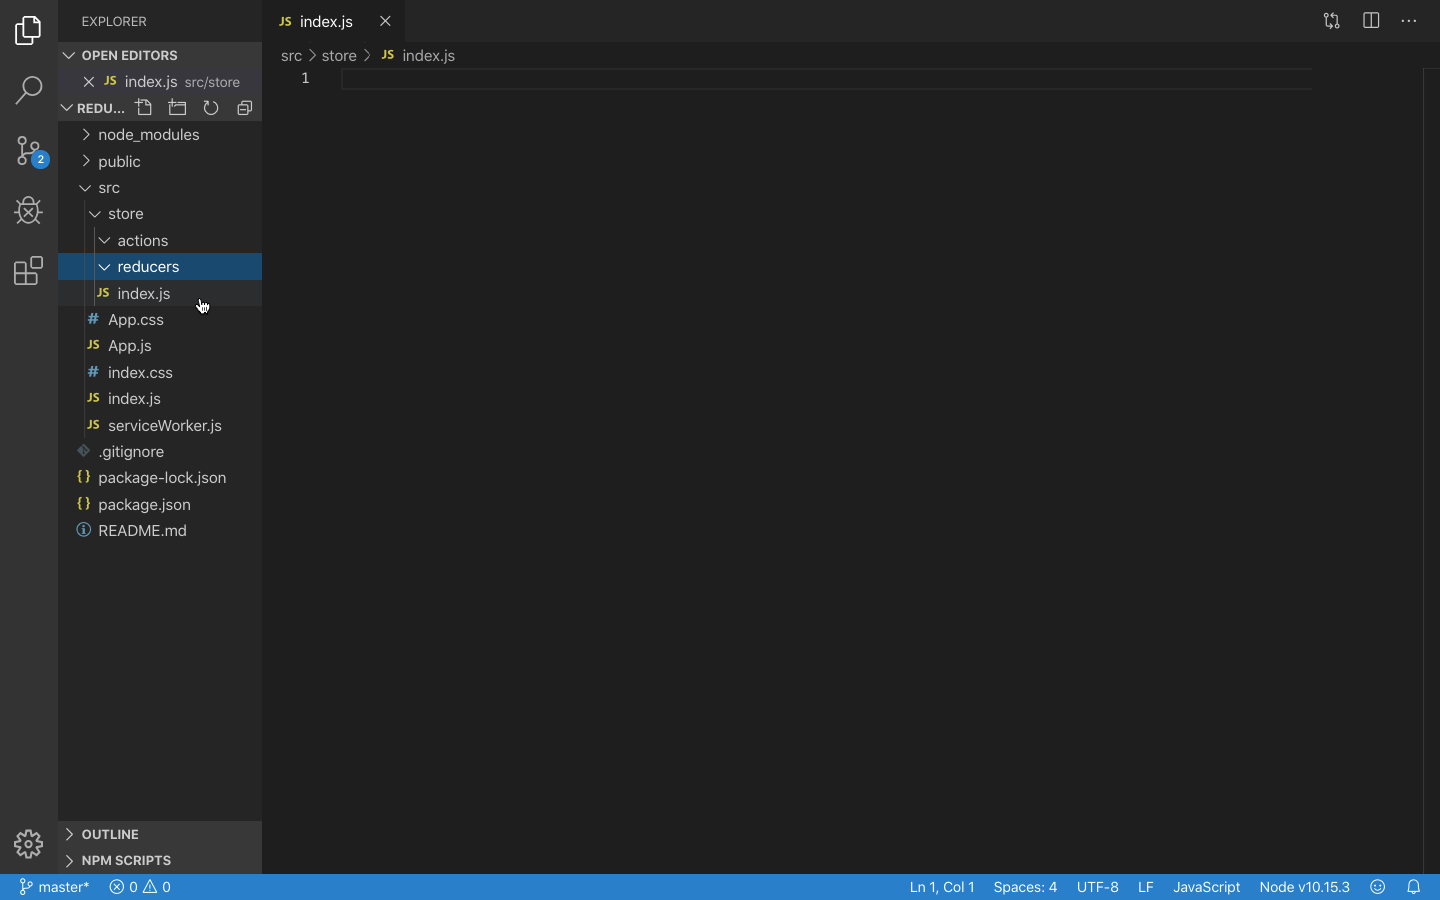
npm i redux react-redux redux-thunkNow let’s open our text editor and set up / clean up our App by removing the logo and app.test.js and create our file structure for our redux store including our actions and reducers folders as well as an index.js to hold our data.
So now our text editor should look something like this:
 *store / actions and reducers and index.js*
Now that we have our initial file set up for our store, let’s go ahead and create our first action and reducer. Our action will take data to update our movies to the movie of our choice with a type and payload while our reducer will be receiving the information and return the payload. In our action folder we will create updateMovies.js and in our reducers folder we will create movielistReducer.js
updateMovies.js:
    export const UPDATE_MOVIES = "UPDATE_MOVIES";

    const updateMovies = {

          type: UPDATE_MOVIES,

          payload: "THE BREAKFAST CLUB"

    };

    export default updateMovies;
Note that we have made UPDATE_MOVIES into a variable so as to avoid mistakes down the road.
Next let’s write in our reducer function for the movie list and receive the data from action and return the payload like so. Not so bad so far. :)
movielistReducer.js:
    import {UPDATE_MOVIES} from '../actions/updateMovies';

    const movielistReducer = (state ={}, {type, payload}) => {

          switch(type) {

                 case UPDATE_MOVIES :

                 return {name: payload}

                 default :

         return state

    };

    };

    export default movielistReducer;
Note that our reducer is taking to parameters, state which is set to an empty object, and action which we have destructured with type and payload.
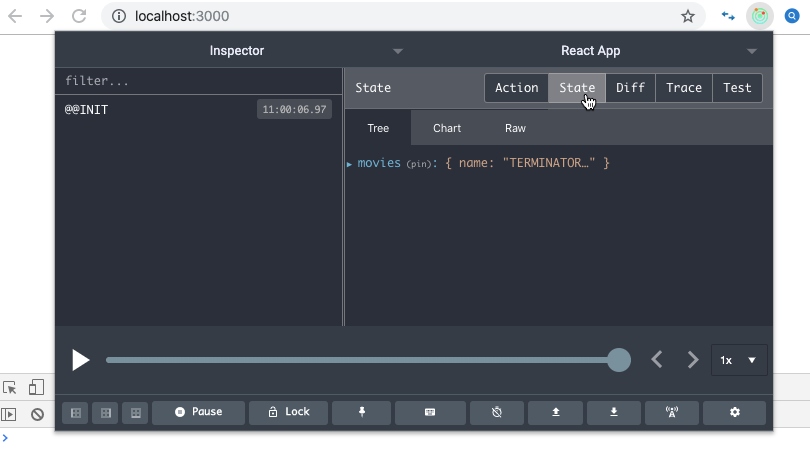
Now that we have the logic written out for our action and reducer to update our movie list, let’s set up our store in our index.js file found in our store folder. We will also add on our redux devtools extension Basic Store which we can grab from the Github https://github.com/zalmoxisus/redux-devtools-extension
index.js (in our store folder):
    import {createStore, combineReducers} from 'redux';

    import movielistReducer from './reducers/movielistReducer';

    const reducer = combineReducers({movies: movielistReducer});

    const initialState = {

    movies: {name: "TERMINATOR 2"}

    };

    const store = createStore(reducer, initialState,
    window.__REDUX_DEVTOOLS_EXTENSION__ &&
    window.__REDUX_DEVTOOLS_EXTENSION__());

    export default store;
Now let’s hook up our store to React and wrap our application around the Provider in our source folder index.js
index.js (src folder):
    import React from 'react';

    import ReactDOM from 'react-dom';

    import './index.css';

    import App from './App';

    import * as serviceWorker from './serviceWorker';

    import store from './store/index'

    import {Provider} from 'react-redux'

    ReactDOM.render(<Provider store={store}><App /></Provider>, document.getElementById('root'));

    // If you want your app to work offline and load faster, you can change
    // unregister() to register() below. Note this comes with some pitfalls.

    // Learn more about service workers: https://bit.ly/CRA-PWA

    serviceWorker.unregister();
We should get an error saying in our console that logo.svg cannot be found. Don’t worry, this is a good sign meaning that our App is now connected with our Redux Store. To remove these errors let’s go finally into our App.js and clean it up.
App.js:
    import React from 'react';

    import './App.css';

    function App() {

       return (

           <div className="App">
           REDUX MOVIELIST APP
           </div>

    );

    };

    export default App;
When we return to our Application in our broswer we should be able to access our redux devtools by clicking on the lit up icon (for Chrome) on the top right side. This will open our goey and if we can click on state we can now see our movie list state being initialized! Very cool.
Ok, awesome. Let’s go back to our text editor and set up our App.js so that it’s connected to our store. We will do that by importing our actions, connect, and with state and dispatch and set up props. After that we will render out our display of the movie list and create a button that can dispatch the new state! So now your App.js should look like this:
App.js:
    import React from 'react';

    import './App.css';

    import {connect} from 'react-redux';

    import updateMovies from './store/actions/updateMovies';

    function App(props) {

    return (

        <div className="App">

        <h3>REDUX MOVIELIST APP</h3>

    <br/>

    <span

    style={{color:'green'}}

    >YOUR CURRENT MOVIE IS: </span>{props.movies.name}

    <br/>

    <button onClick={props.updateMovies}>SELECT NEW MOVIE</button>

    </div>

    );

    };

    const MapStateToProps = (state) => {

        return {

        movies: state.movies

    };

    };

    const MapDispatchToProps = (dispatch) => {

    return {

    updateMovies: ()=> dispatch(updateMovies)

    }

    };

    export default connect(MapStateToProps, MapDispatchToProps)(App);
Phew! Ok and now we should have our entire Redux Cycle completely hooked up and running and our App updating the state to our new movie selection. Yes yes I know… it’s not the most styled up App of all time, but considering the boilerplate setup for Redux let’s just stick to the concepts and feel free to style this up as you would like. But for now, pat yourself on the back and have a sip of coffee! Great work.
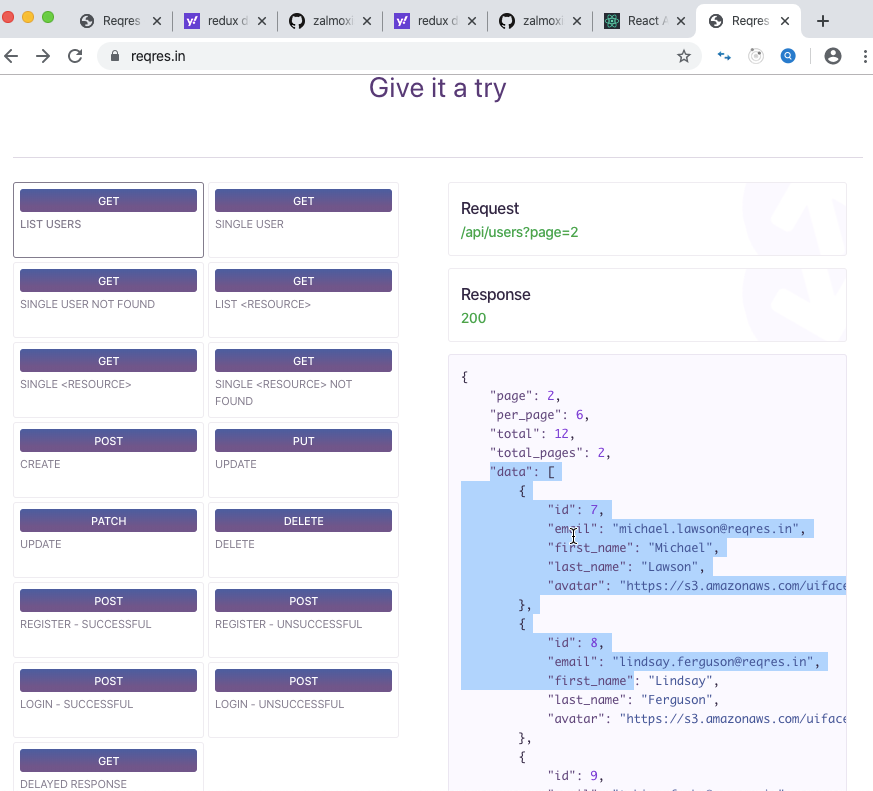
Our next challenge will be implementing an async action Api fetch for user data information. Ready? We will be using data from https://reqres.in/ If you go to the website you can see that we can get a request for user data from /api/users?page=2
Ok, let’s go back to our actions folder in the text editor and write out our fetch api code in a new file called fetchUsers.js!
fetchUsers.js:
    export const FETCH_USERS = "FETCH_USERS";

    const fetchUsers = (dispatch) => {

        fetch('https://reqres.in/api/users')

        .then(res => res.json())

        .then(res => dispatch({type:FETCH_USERS,payload:res.data}))

    };

    export default fetchUsers;
And let’s make a new reducer in our reducer folder entitiled userReducer.js and code it in:
userReducer.js:
    import {FETCH_USERS} from '../actions/fetchUsers';

    const userReducer = (state = {}, {type, payload}) => {

        switch(type) {

            case FETCH_USERS :

            return payload

            default :

        return state

    };

    };

    export default userReducer;
Back in our index.js file in our store folder we can now import userReducer, add it to our combineUsers, set it to users, and set up its initial state which will be an array. We will also need to import thunk and applyMiddleWare so that we can perform an async action using custom middleware. Finally, we will also need to import compose so that we are able to use both our devtools extension and our middleware!
index.js (store folder):
    import {createStore, combineReducers, compose, applyMiddleware} from 'redux';

    import movielistReducer from './reducers/movielistReducer';

    import userReducer from './reducers/userReducer';

    import thunk from 'redux-thunk';

    const middleware = [thunk];

    const allReducers = combineReducers({movies: movielistReducer, users: userReducer});

    const initialState = {

        users: [],

        movies: {name: "TERMINATOR 2"}

    };

    const store = createStore(allReducers, initialState,
    compose( applyMiddleware(...middleware),
    window.__REDUX_DEVTOOLS_EXTENSION__ &&
    window.__REDUX_DEVTOOLS_EXTENSION__()));

    export default store;
Note that we use the spread operator to apply our middleware and set thunk into an array to a const (middleware). As well, we have changed our const from reducer to Allreducers.
Alright! Now let’s go back into our App.js and import our fetch action. We can use the map method to map through our users and display the pertinent data by dispatching our fetch with a button. Your App.js should now look like:
App.js:
    import React from 'react';

    import './App.css';

    import {connect} from 'react-redux';

    import updateMovies from './store/actions/updateMovies';

    import fetchUsers from './store/actions/fetchUsers';

    function App(props) {

        return (

        <div className="App">

            <h3>REDUX MOVIELIST APP</h3>

            <br/>

            <span

            style={{color:'green'}}

            >YOUR CURRENT MOVIE IS: </span>{props.movies.name}

        <br/>

        <p><button onClick={props.updateMovies}>SELECT NEW MOVIE</button> </p>

        <br/>

            {props.users.length === 0 ?

            <p>THERE ARE NO USERS</p> :

            props.users.map(user=> {
              <p key={user.id}>{user.first_name} - {user.email}</p>)}
            }

        <br/>

        <button onClick={props.fetchUsers}>FETCH USERS</button>

        </div>

    );

    };

    const MapStateToProps = (state) => {

        return {

        movies: state.movies,

        users: state.users

    };

    };

    const MapDispatchToProps = (dispatch) => {

        return {

        updateMovies: ()=> dispatch(updateMovies),

        fetchUsers: ()=> dispatch(fetchUsers)

    };

    };

    export default connect(MapStateToProps, MapDispatchToProps)(App);
Awesome! And now if we check back in our App and we click on our button to fetch users we should see our users being fetched :) :
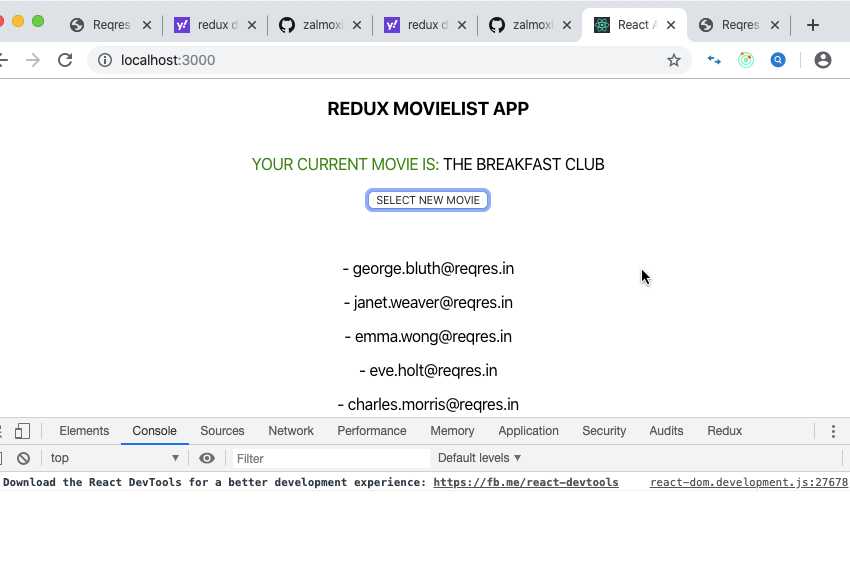
And we did it! We have just observed two Redux cycles in live action. One movie list which we update on dispatch to the new movie and one async action where we fetch data for our users. You definitely can take a pause and have some more celebratory coffe. Sweet work.
Realizing there is a bit of set up involved here, but once we get the wheels in motion and we set things up in a way where we can observe our data management and have a store and see how our components are wrapped and listen to eachother the fundamentals for Redux start to make much more sense. This is a great starting point. Like I mentioned earlier, even though there are a lot of convoluted explanations out there.
This is just a starting example for Redux and hopefully now that we’ve gone over some of the core concepts and seen them in action, this can help clarify a few things and set a good launching pad to further our knowledge. If you have any questions about the concepts or code, please leave me a message or a comment and I’ll get back.
You can also find the source code on my git below as well as a much more extensive code along video in my channel where we go over everything in more detail here:
Github Repo: https://github.com/01Clarian/ReduxMovieAppTutorial
Finally, I’d like to share some links to what I find to be great explanations and tutorials of Redux which inspired this post.
- The Complete Web Developer: Zero to Mastery (Although this is a complete web development course, Andrei’s Redux section is awesome).
- Complete React Developer (w/ Redux, Hooks, GraphQL) (Advanced React course where you build a massive E-commerce app with Redux, Hooks, GraphQL, ContextAPI, Stripe, Firebase).
- Check out the first 6.5 hours of it below:
Ok, and that’s it. Thanks for checking this out and hope this has been helpful!


![[December 2025] Web Developer Monthly Newsletter 💻🚀 preview](https://images.ctfassets.net/aq13lwl6616q/2gGBPeglcaBbbxBBcf2fc2/44e7ebad13b0715552f9f61a5c9fa207/Web_Dev_Monthly.png?w=800&h=450&q=50&fm=webp&bg=transparent)


